Vorwort
Der Charme des Ufers zeichnet sich in der Regel durch seine Ruhe aus, aber wie jeder weiß, der schon einmal mit einer Immobilie am Wasser zu tun hatte, ist das Wasser niemals ruhig. Ein Schwimmdock ist eine große Investition - ein Tor zur Erholung, eine Plattform für den Handel und eine Brücke zwischen dem Land und der Wasserwelt. Doch sein Nutzen hängt von seiner Stabilität ab. Ein nicht ordnungsgemäß verankertes Dock ist nicht nur ein Ärgernis, sondern auch eine Belastung, die zum Einsturz der Struktur, zu Sachschäden und sogar zu Unfällen führen kann.
Die Verankerung von Schwimmdocks ist eine bautechnische und umwelttechnische Aufgabe. Sie erfordert einen Kompromiss zwischen den strengen Anforderungen der Konstruktion an Land und der fließenden, unvorhersehbaren Natur des Wassers. Damit ein Dock über Jahrzehnte hinweg eine stabile Ressource ist, muss man die beteiligten Kräfte wie Wind, Strömung, Auftrieb und Reibung verstehen und mit den richtigen Materialien und Techniken bewältigen. Ein Schwimmdock ist wie ein Schiff ohne Besatzung, und wenn es nicht sorgfältig und vorausschauend verankert wird, ist es den Elementen ausgeliefert.
Was ist ein Schwimmdock?
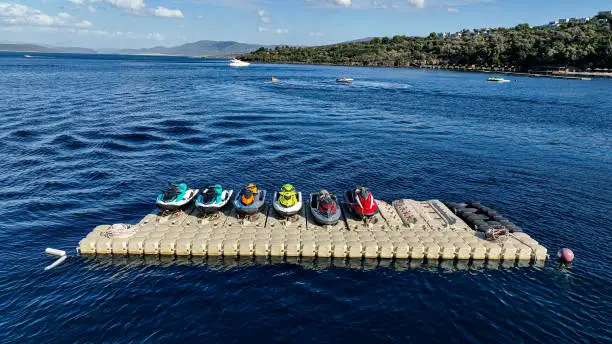
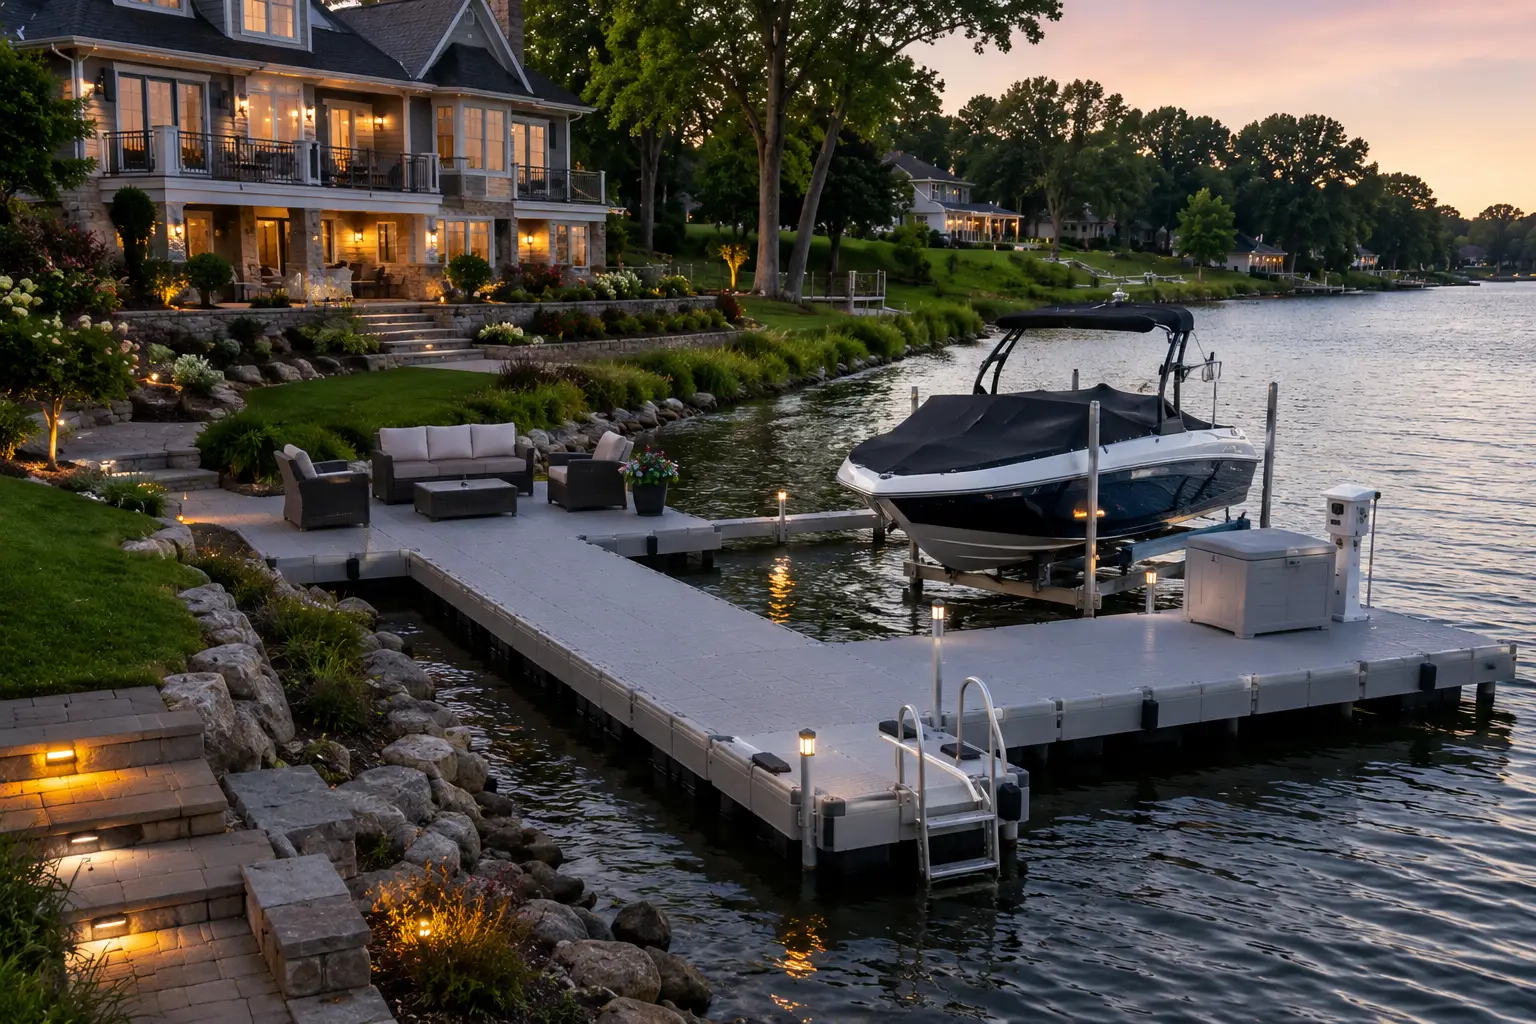
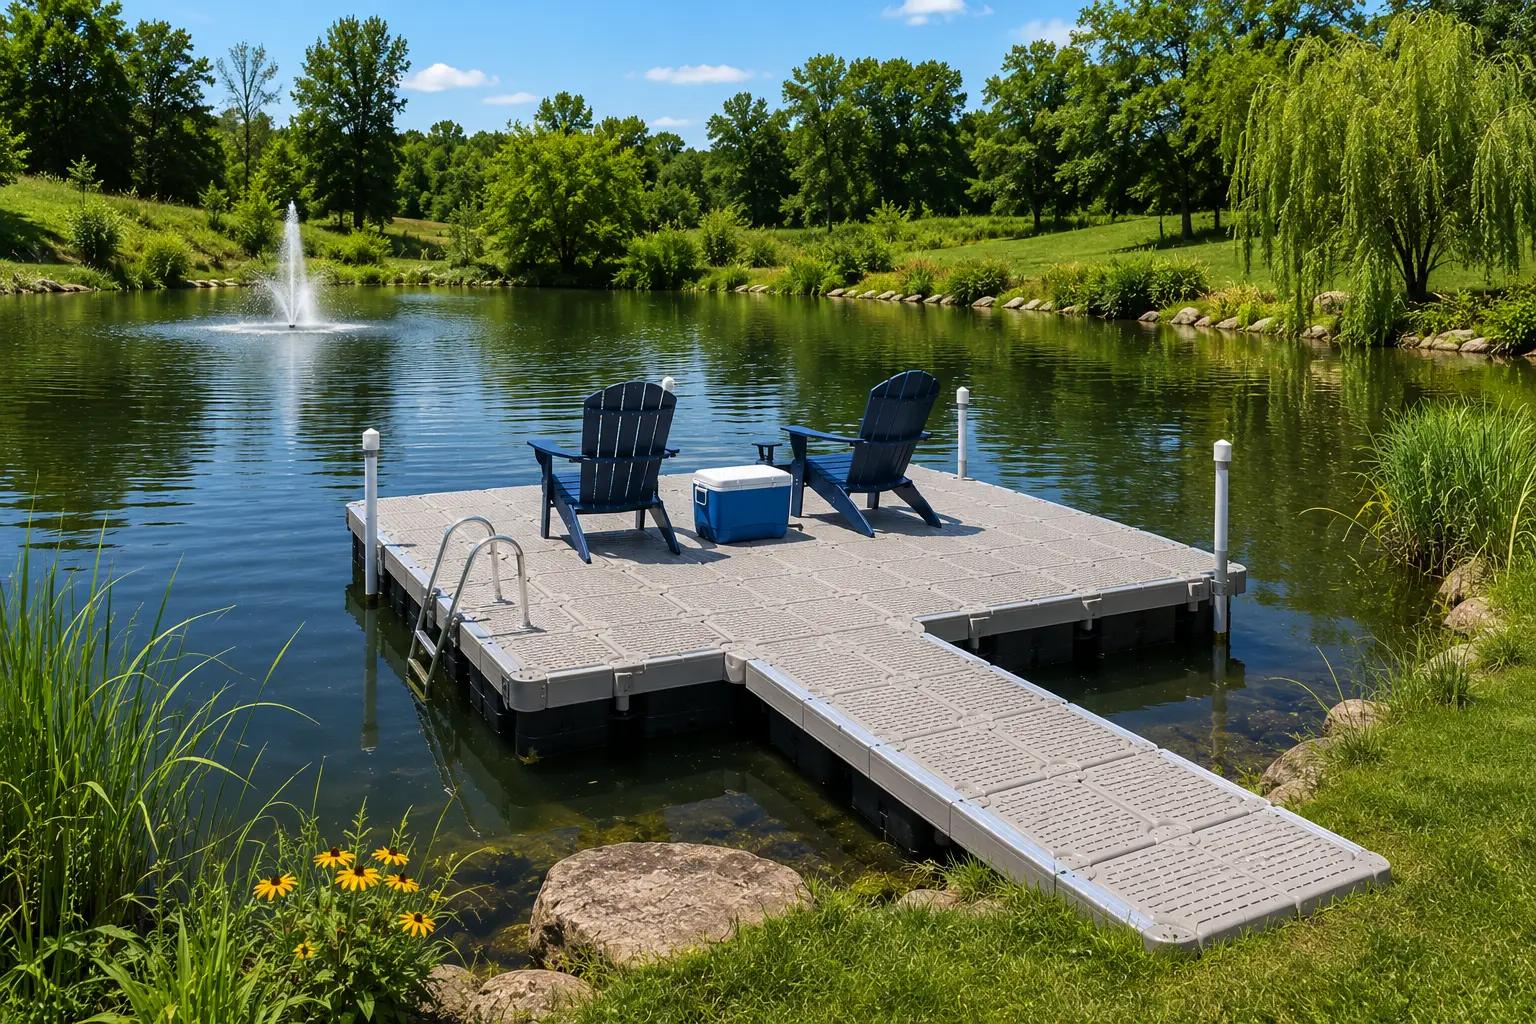
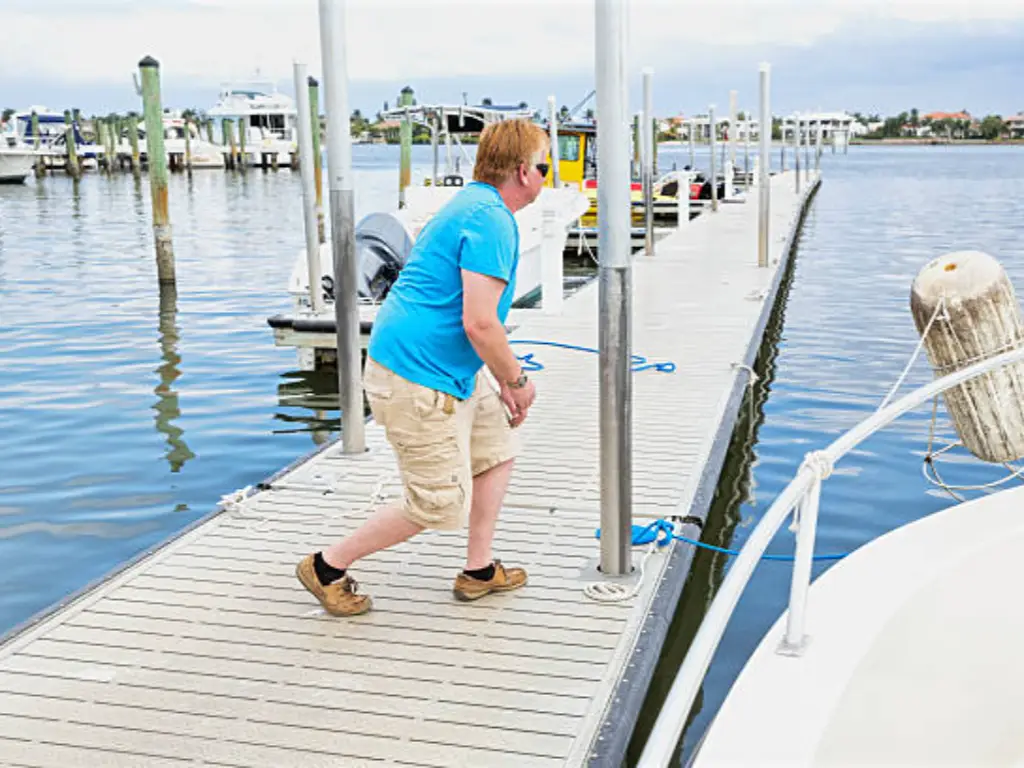
Ein Schwimmdock ist eine tragbare und flexible Plattform, die auf dem Wasser ruht und deren Höhe mit dem Wasserstand variiert. Im Gegensatz zu festen Docks, die für die Installation am Ufer oder auf dem Meeresboden gebaut werden, sind Schwimmdocks so konstruiert, dass sie sich mit den Wasserströmungen bewegen und mit einem Steg oder einer Rampe mit Handläufen für Stabilität und einem Verbindungsscharnier für die Rampe verwendet werden. Diese Docks sind außerdem rost- und korrosionsbeständig, was bedeutet, dass sie eine dauerhafte Lösung für den Zugang zu Docks darstellen.
Schwimmdocks werden in der Regel aus leichten und robusten Materialien wie Aluminium, Kunststoff oder Holz hergestellt und schwimmen auf schwimmfähigen Materialien wie Schaumstoff oder luftgefüllten Fässern. Sie können je nach Art der Boote und Wasseraktivitäten, die am Ufer durchgeführt werden sollen, in verschiedenen Formen und Abmessungen ausgeführt werden. Um zu verhindern, dass sich das Schwimmdock vom Ufer entfernt, muss es mit Hilfe eines wirksamen Verankerungssystems wie dem Schwimmdock-Bausatz, der mit Planken, Schnellverschlüssen und Ösenschrauben geliefert wird, ordnungsgemäß gesichert werden.
Vorteile einer ordnungsgemäßen Dockverankerung
Die ordnungsgemäße Verankerung eines Schwimmdocks bringt zahlreiche Vorteile mit sich, um seine Stabilität zu gewährleisten. Der erste Vorteil einer gut verankerten Anlegestelle ist, dass sie stabiler wird. Das heißt, wenn das Dock auf dem Grund des Gewässers verankert ist, kann es nicht so leicht durch Wind, Wellen oder Boote bewegt oder erschüttert werden.
Die richtige Verankerung spielt auch eine entscheidende Rolle, wenn es darum geht, Ihr Schwimmdock vor Schäden zu schützen, die durch Wetter oder Wellen verursacht werden können. Wenn ein Dock mit einem Schwimmstegsystem gut verankert ist, ist es in einer guten Position, um den Naturgewalten entgegenzuwirken, damit es nicht beschädigt oder vom Ufer weggezogen wird. Außerdem bietet ein fester Steg den Nutzern einen sicheren Arbeitsbereich, so dass die Wahrscheinlichkeit eines Unfalls oder einer Verletzung beim Ein- oder Aussteigen aus dem Boot auf ein Minimum reduziert wird.
Welchen Einfluss haben Wetter und wechselnde Wasserstände auf den Verankerungsprozess?
Das Wetter und wechselnde Wasserstände haben einen großen Einfluss auf den Verankerungsprozess und die Langlebigkeit des Schwimmdocks. Bedingungen wie starker Wind, starke Strömungen und hohe Wellen können den Druck auf das Verankerungssystem erhöhen, was zu Schäden am Dock oder sogar zu dessen Verschiebung führen kann. In Regionen, in denen Wirbelstürme oder Sturmfluten häufig auftreten, kann es notwendig sein, das Dock aus dem Wasser zu ziehen oder das Verankerungssystem zu verstärken.
Die Zuverlässigkeit der Verankerung wird auch durch den Untergrund bestimmt:
- Felsen: Stabil, aber nicht durchdringend; die einzig mögliche Lösung in diesem Fall sind auf der Schwerkraft basierende Deadweights.
- Sand: Einschraubschnecken eignen sich am besten für Sand, der eine gute Saugfähigkeit und mechanische Festigkeit aufweist.
- Schlick/Muck: Bietet geringen Widerstand; Anker in diesen lockeren Böden neigen zum Kriechen und benötigen eine breitere Basis oder mehr Gewicht.
Es ist auch möglich, eine zusätzliche Kettenlänge vorzusehen, damit sich der Steg bei Änderungen des Wasserstands heben und senken kann. In größeren Gewässern kann es erforderlich sein, zusätzliches Material wie eine ausreichende Kettenspannung zu verwenden, um sicherzustellen, dass das Dock verankert bleibt.
Denken Sie bei der Auslegung Ihres Stegs an die Wetter- und Wasserbedingungen in Ihrer Region und daran, welche Art von Verankerung angesichts dieser Kräfte am effektivsten ist, ob es sich um Orkanlöcher oder verstärkte Verankerungssysteme handelt, und welche Kettenlänge angemessen ist.
Umweltvorschriften für die Verankerung im Hafen
Bei der Verankerung von Schwimmdocks gibt es einige Umweltgesetze und -normen, die beachtet werden sollten, um die Auswirkungen auf die Umwelt zu minimieren. Im Hinblick auf die Erhaltung des Lebensraums sollte man es vermeiden, die Anker und Rammpfähle so zu setzen, dass sie die aquatischen Lebensräume und Fischbrutplätze beeinträchtigen. Darüber hinaus sollte die Art des Materials, das beim Bau von Docks und Verankerungssystemen verwendet wird, wie z. B. Deckmaterial, ebenfalls umweltfreundlich sein, um die Gefahr der Verschmutzung des Wassers durch giftige Stoffe zu minimieren.
Was die Einhaltung der gesetzlichen Bestimmungen angeht, so sind in den meisten Ländern Genehmigungen erforderlich, bevor Anker oder Pfähle auf öffentlichem Grund und Boden installiert werden können. Diese Bauwerke müssen häufig von Behörden wie dem Army Corps of Engineers (USA) oder den örtlichen Schifffahrtsämtern genehmigt werden, um sicherzustellen, dass sie die Schifffahrt nicht behindern oder die Rechte der Anrainer verletzen. Eine frühzeitige Rücksprache mit den örtlichen Bauämtern ist notwendig, da illegale Installationen zu hohen Geldstrafen oder sogar zur Entfernung führen können.
Ein weiterer wichtiger Faktor, der berücksichtigt werden sollte, ist der Standort von Docks und Ankern, die die Wasserwege nicht beeinträchtigen und für die Nutzer potenziell gefährlich sein können. Schließlich sind die Auswirkungen der Bauwerke auf die Küstenlinie zu berücksichtigen, und es ist zu vermeiden, dass sie in erosionsgefährdeten oder küstennahen Gebieten errichtet werden.
Das beste Verankerungssystem: 2-stufige Entscheidungshilfe
Die Wahl der Verankerungstechnik ist ein Kompromiss zwischen den Wasserbedingungen und dem Material des Stegs. Nutzen Sie diese Überlegungen, um die sicherste Lösung für Ihr Projekt zu finden.
Schritt 1: Bewerten Sie Ihr Umfeld
Die mechanische Logik Ihrer Anker wird durch Ihre Wasserbedingungen bestimmt.
- In Extreme Bedingungen und Gezeitenzonen: Der Goldstandard ist die Pfahlverankerung. Bei starkem Seegang, starkem Wind oder ständigem Ansteigen und Abfallen des Wassers können Sie Pfähle in den Boden rammen lassen und haben dann eine permanente, vertikale Spur, auf der Ihr Steg läuft. Diese Art der Verankerung ist am stabilsten und muss professionell ausgeführt werden.
- Für tiefes Wasser (>30 Fuß): Deadweight & Chain ist der Industriestandard. In Fällen, in denen das Wasser für Pfähle zu tief ist, sorgen schwere Betonblöcke (Deadweights) unter Ausnutzung der Schwerkraft und eines kreuzweisen Kettenmusters für seitliche Stabilität ohne Tiefenbeschränkung. Im Gegensatz zu instabilen geradlinigen Systemen wird durch die Kreuzung der Ketten in einem Winkel von 45 bis 60 Grad eine geometrische Spannung erzeugt, die die Position des Stegs fixiert. Das Wichtigste ist, 5 bis 10 Prozent Spielraum zu lassen, damit das System sicher mit den Gezeiten oder der Flut ansteigen kann, ohne dass die Beschläge brechen.
- Schmale Kanäle und Seedeiche: Steife Arm-/Seewandbefestigungen: Sie sind ähnlich wie eine mechanische Leine. Sie sind ideal, um eine Anlegestelle in einem konstanten Abstand im Fluss oder in den Kanälen zu halten, damit sie nicht zum Ufer hin abdriftet.
- Im Fall von Calm, Shallow Ponds: Rohre und Muffen sind am DIY-freundlichsten. Wenn das Wasser weniger als 10 Fuß hoch und der Boden weich ist, sind einfache Metallrohre, die durch Muffen geschoben werden, zu geringen Kosten stabil genug.
Die Bewegung des Stegs wird durch die Wasserdynamik bestimmt, aber die Geologie des Bodens entscheidet über den endgültigen Halt Ihres Systems. Die Kompatibilität der Geologie Ihres Standorts kann anhand der folgenden Matrix ermittelt werden:
| Substrat-Typ | Empfohlene Verankerungsmethode | Mechanische Logik | Wichtige Überlegungen |
| Festes Gestein / Grundgestein | Eigengewicht (basierend auf Schwerkraft) | Sie beruht ausschließlich auf Masse und Reibung. | Möglicherweise ist 20%-30% ein zusätzliches Gewicht erforderlich, um ein Verrutschen zu verhindern. |
| Sand / festes Sediment | Schneckenbohrer / Erdanker | Funktioniert wie eine Schraube mit mechanischer Spannung und Sog. | Für die Installation in tiefen Gewässern sind oft professionelle Taucher erforderlich. |
| Schluff / loser Schlamm | Tiefes Rammgut oder breitbasiges Eigengewicht | Die Pfähle müssen eine "tragende Schicht" erreichen. Gewichte brauchen eine breite Aufstandsfläche. | Verankerungen neigen bei anhaltenden Windlasten zum "Kriechen". |
| Lehm | Pfähle oder Schwerlastbohrer | Lehm bietet einen hervorragenden Seitenhalt und eine hohe Griffigkeit für Fäden. | Der Einbau ist arbeitsintensiv und erfordert schwere Rammgeräte. |
| Kies/Kopfsteinpflaster | Schwere Kette & Eigengewicht | Unregelmäßige Oberflächen tragen dazu bei, dass schwere Blöcke und Ketten "hängen bleiben". | Erdbohrer sind schwierig zu installieren, da sie auf große Steine treffen können. |
Schritt 2: Finden Sie heraus, ob die Methode zu Ihrem Dockmaterial passt
Das Material und die Konstruktion Ihres Stegs sind ausschlaggebend dafür, ob er der physischen Belastung durch die Verankerung standhält. Verschiedene Stege benötigen unterschiedliche Grade an Unterstützung und Flexibilität.
- Schwimmende Docks aus Aluminium
Verankerung: In der Regel durch Pfähle, steife Arme oder Schwergewichtsanker gesichert. Man kann das Dock auf dem Meeresgrund verankern, indem man Pfähle in den Boden treibt. Ein Paar steife Arme, die vom Steg zum Ufer reichen, verhindern die seitliche Bewegung des Stegs. Eigengewichtsanker stützen sich auf die Masse sperriger Gegenstände (z. B. Betonblöcke und andere Strukturen), um das Dock an seinem Platz zu halten.
- Schwimmende Docks aus Holz
Manchmal werden sie mit Hilfe von Pfählen, Ankerketten oder Seilen befestigt. Sie können in den Wasserboden gerammt werden, um sicherzustellen, dass sie einen guten Halt für den Steg bieten. Um ein Abdriften zu verhindern, wird das Dock mit Ketten oder Seilen am Ufer oder mit schweren Ankern auf dem Meeresgrund verankert.
- Modulare Schwimmdocks aus Kunststoff
In der Regel mit Pfählen, Ketten oder Schwerlastankern verankert. Sie können in den Wasserboden gerammt werden, um dem modularen Dock einen guten Halt und Stabilität zu geben. Das verwendete Material ist Kunststoff. Sie können das Dock mit dem Ufer oder mit schweren Ankern auf dem Meeresgrund verbinden. Schwergewichtsanker sind Anker, die sich auf das Gewicht des Objekts stützen, um zu verhindern, dass das Dock wegschwimmt.
- Schwimmende Docks aus Beton
In der Regel mit Pfählen oder Eigengewichtsankern verankert. Betonpfähle können in den Wasserboden gerammt werden, um sicherzustellen, dass der Steg auf einem stabilen Fundament ruht. Eigengewichtsanker beruhen auf der Masse von Betonblöcken, die das Dock in Position halten und es am Abdriften hindern.
- Aufblasbare Schwimmdocks
Manchmal wird es mit Seilen, Ankerketten oder kleinen Ankern befestigt. Dazu können Seile oder Ankerketten verwendet werden, mit deren Hilfe das aufblasbare Dock an einigen Ankern am Ufer oder am Grund des Gewässers befestigt wird. Kleine Anker (z. B. Temporäre Verankerungsmöglichkeiten sind das Werfen von Gegenständen (z. B. Enterhaken oder Pilzanker) ins Wasser.
- Rohr-Schwimmdocks
Die Verankerung erfolgt in der Regel durch Pfähle, Ankerketten oder Schwerlastanker. Die Rohrpfähle können in den Wasserboden gerammt werden, um das Dock zu stützen. Sie können eine direkte Verbindung zwischen dem Dock und dem Ufer darstellen oder als schwere Anker auf dem Meeresgrund verankert werden. Bei Schwergewichtsankern werden Gewichte in Form von massiven Gegenständen zur Sicherung des Docks verwendet.
Die ultimative Entscheidungsmatrix für die Verankerung
| Verankerungsmethode | Beste Umwelt | Tiefe Eignung | Einbauart | Genehmigungen und Umweltauswirkungen | Winter-/Eisbeständigkeit | Häufigkeit der Wartung | Beste Materialübereinstimmung | Anfängliche Kosten |
| Stapeln | Starker Wind, Wellen und starker Bootsverkehr | Bis zu 30 Fuß | Professionell (Rammgerät erforderlich) | Hohe Komplexität; permanente Struktur mit Störung des Meeresbodens. | Schlecht; es besteht die Gefahr, dass die Stapel aus dem Bett herausgezogen werden. | Sehr niedrig | Beton, Holz, Aluminium | Hoch |
| Eigengewicht & Kette | Tiefes Wasser oder felsiger Seegrund | Unbegrenzt | Mäßig (Erfordert Boot/Barkasse) | Mäßig/gering; gilt als vorübergehend/mobil mit minimalen Auswirkungen auf das Bett. | Ausgezeichnet; die Ketten können gelockert oder entfernt werden, um Eisschäden zu vermeiden. | Mittel (Jährliche Überprüfung der Kette) | Modulare HDPE-, Holz- und Rohrdocks | Mäßig |
| Steifer Arm / Seewand | Flüsse, enge Kanäle oder steile Uferlinien | N/A (landseitig) | Moderat (Heimwerken möglich) | Gering; Bauarbeiten an Land mit vernachlässigbaren Unterwasserauswirkungen. | Mäßig; es wird empfohlen, die Verbindung bei starkem Eis zu unterbrechen. | Niedrig | Aluminium, HDPE Modular | Mäßig |
| Rohr & Muffe | Ruhige, flache Teiche oder private Seen | Unter 10 Fuß | DIY-freundlich | Sehr niedrig; nicht dauerhaft, leicht und in der Regel genehmigungsfrei. | Gut; die Rohre können für die Überwinterung leicht entfernt werden. | Mittel (Anpassung an den Wasserstand) | HDPE Modular, Klein Aluminium | Niedrig |
Um die beste Verankerung zu wählen, sollten Sie zunächst Ihre Umgebung analysieren. Professionelle Pfähle sollten dort verwendet werden, wo in stark befahrenen oder gezeitenabhängigen Gebieten maximale Stabilität gegeben ist. In tiefem Wasser (mehr als 30 Fuß) ist der beste Industriestandard das Eigengewicht und die Kette. In engen Kanälen wird ein starrer Arm verwendet, um den genauen Abstand zwischen den Ufern einzuhalten. Die Rohr- und Muffentechnik ist eine relativ kostengünstige Do-it-yourself-Methode für flache, ruhige Teiche. Schließlich sollte das System auf das Material Ihres Stegs abgestimmt sein, um eine möglichst lange Lebensdauer und eine möglichst geringe strukturelle Belastung zu gewährleisten.
Die für die Verankerung eines Schwimmdocks benötigten Materialien sind einfach
Die Langlebigkeit Ihres Schwimmstegs hängt von der Auswahl von Materialien ab, die den ständigen hydraulischen Kräften und korrosiven Bedingungen standhalten. In der folgenden Tabelle sind die wichtigsten Elemente, vom Fundament bis zur kleinsten Sicherheitsfuge, aufgeführt, die für den Bau eines professionellen Verankerungssystems erforderlich sind, um Sie bei der Planung Ihres Baus zu unterstützen.
| Kategorie | Komponente | Material und Spezifikation | Bester Anwendungsfall |
| Kernmetallwerkstoffe | Unedle Metalle | Feuerverzinkt (HDG), Edelstahl 316, Marine-Aluminium | HDG für schwere Ketten; Edelstahl 316 für Salzwasserbefestigungen; Aluminium für Konstruktionsrahmen. |
| Verankerung von Fundamenten | Deadweights | Betonblöcke | Traditionelle Schwerkraftverankerung für tiefe Gewässer. |
| Erdanker | Schnecken aus Metall / Wendelschnecken | Hoher mechanischer Grip in sandigen oder schlammigen Seeböden. | |
| Pfähle | Stahlrohre oder Holzpfähle | Vertikaler Antrieb für maximale dauerhafte Stabilität. | |
| Flexible Verbinder | Verankerungskette | Verzinkte Kette | Nutzt das Gewicht, um eine "Oberleitungsspannung" zu erzeugen, die als natürlicher Puffer wirkt. |
| Drahtseil | Kabel aus rostfreiem Stahl | Hohe Zugfestigkeit; muss mit Kauschen verwendet werden, um ein Ausfransen zu verhindern. | |
| Synthetische Seile | Nylon / Polypropylen | Leichte oder temporäre Verankerung für kleine Plattformen. | |
| Spannung und Einstellung | Winden | HDG oder Edelstahl | Wird für die Ersteinrichtung und saisonale Wasserstandsanpassungen verwendet. |
| Schock-Federn | Heavy-Duty-Pufferfedern | Absorbiert die plötzliche kinetische Energie der Wellen und schützt so den Stegrahmen. | |
| Spannschlösser | HDG/Edelstahl | Bietet Mikro-Einstellungen, um geringfügiges Schwanken oder "Durchhängen" zu beseitigen. | |
| System "Gelenke" | Schäkel | HDG / Edelstahl 316 (Sicherheitsbolzen Typ) | Das wichtigste Bindeglied zwischen Ankern, Ketten und dem Steg. |
| Kettenkäfige | HDG Stahlnuten | Wird an der Rampe montiert, um Ketten in bestimmten Längen zu verriegeln und zu sichern. | |
| Rigging Hardware | Fingerhüte & Crosby-Clips | Schützt die Kabelösen vor Reibung und sichert die Drahtseilenden. | |
| Stapelführungsrollen | Polyurethan / Verzinkter Stahl | Unverzichtbar für Pfahlsysteme, um einen reibungslosen vertikalen Verlauf zu ermöglichen. |
Ein effektives Verankerungssystem muss ein ausgewogenes Verhältnis zwischen Festigkeit, Flexibilität und Reibungskontrolle aufweisen. Während die Betongewichte oder Pfähle als strukturelle Basis dienen, ist die verzinkte Kette die Lunge des Systems, und ihr Gewicht dient dazu, die Wellenenergie zu absorbieren. Für Schäkel und Verschlüsse in Salzwasser muss 316er Edelstahl verwendet werden, um Lochfraß durch Chloride zu vermeiden. Schließlich sind die "Gelenke" wie Pfahlführungsrollen und Kauschen von wesentlicher Bedeutung für die Minimierung der mechanischen Reibung. Ohne diese Schutzvorrichtungen würde die Wasserbewegung letztendlich die Kabel durchschneiden und die Halterungen erodieren, was zum Zusammenbruch des Systems führen würde.
Wie verankert man ein schwimmendes Dock?
Die Reparatur eines Schwimmdocks ist ein komplizierter Prozess, der eine Reihe von Schritten umfasst, um eine solide Basis zu gewährleisten.
- Bewerten Sie den Standort: Zunächst sollten Sie den Standort Ihres Schwimmstegs bestimmen. Einige der Faktoren sind die Wassertiefe, die Art des Bodens, ob er sandig, schlammig oder felsig ist, und der Grad der Exposition gegenüber Wind und Wellen. Diese Informationen helfen Ihnen, das richtige Verankerungssystem für Ihren Standort zu bestimmen.
- Wählen Sie das Verankerungssystem: Hier sollte man die Lagebeurteilung berücksichtigen und das am besten geeignete Verankerungssystem für den jeweiligen Fall auswählen. Wählen Sie den richtigen Ankertyp und die richtige Ankerleine, die die erforderliche Haltekraft und Stabilität für Ihr Schwimmdock bieten.
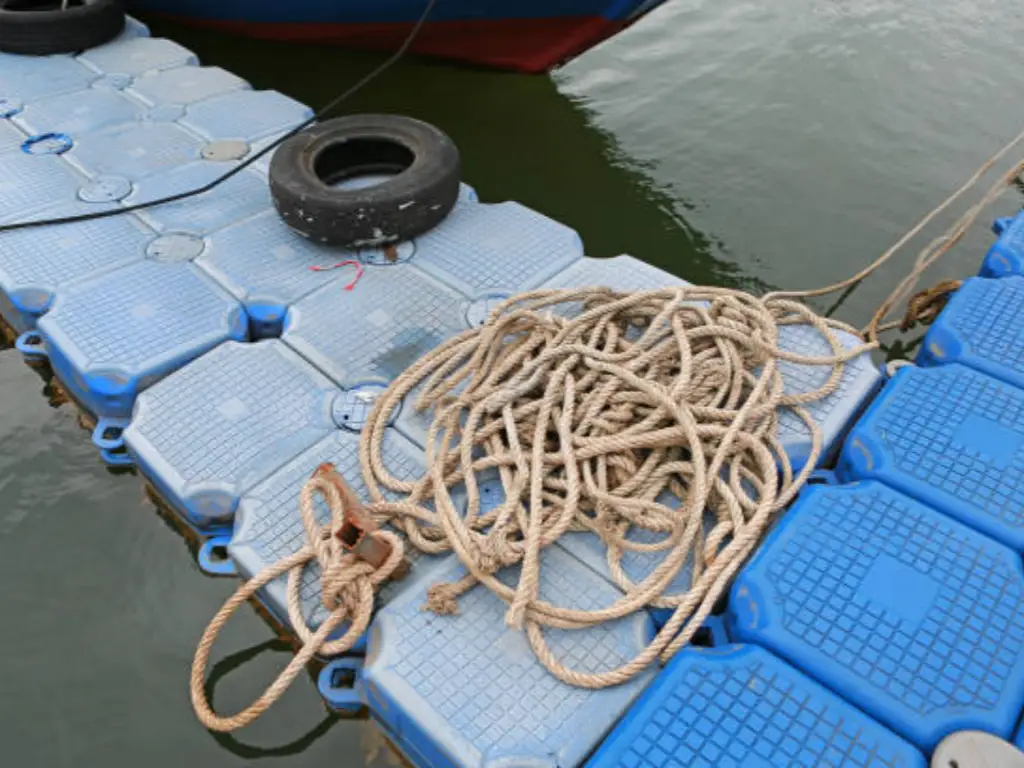
- Sammeln Sie Werkzeuge und Materialien: Sammeln Sie alle Werkzeuge und Materialien, die für die Verankerung der Struktur erforderlich sind. Dazu gehören unter anderem Anker, Ankerleinen, Schäkel, Kauschen, Winden und alle anderen Beschläge, die je nach Art des Verankerungssystems erforderlich sein können.
- Bereiten Sie das Dock vor: Vergewissern Sie sich vor dem Verankern, dass das Schwimmdock gut konstruiert ist und sich an der richtigen Stelle befindet, an der Sie es haben möchten. Prüfen Sie, ob alle Verbindungsstellen der Stegteile fest miteinander verbunden sind und ob der Steg gut auf dem Boden liegt.
- Markieren Sie die Verankerungspunkte: Je nach Größe und Form des Docks sollten Sie festlegen, wo Sie die Anker setzen wollen. Diese Punkte sollten mit Bojen oder anderen temporären Strukturen markiert werden, die bei der Verankerung des Bauwerks helfen.
- Positionieren Sie die Verankerungen: In diesem Fall benötigen Sie ein Boot oder ein anderes Hilfsmittel, um die Anker zu den markierten Stellen zu transportieren. Lassen Sie die Anker langsam auf den Grund herab und vergewissern Sie sich, dass sie richtig positioniert und gut in das Sediment eingebettet sind. Bei Pfahlankern müssen die Anker mit geeignetem Werkzeug in den Meeresboden oder den Seegrund gerammt werden.
- Installieren Sie die Dübel: Wenn die Anker gesetzt sind, befestigen Sie die Ankerleinen mit Schäkeln oder anderen geeigneten Verbindungen an den Ankern. Achten Sie darauf, dass die Verbindungen ordnungsgemäß hergestellt und so gesichert sind, dass sie nicht leicht gelöst oder abgeschüttelt werden können.
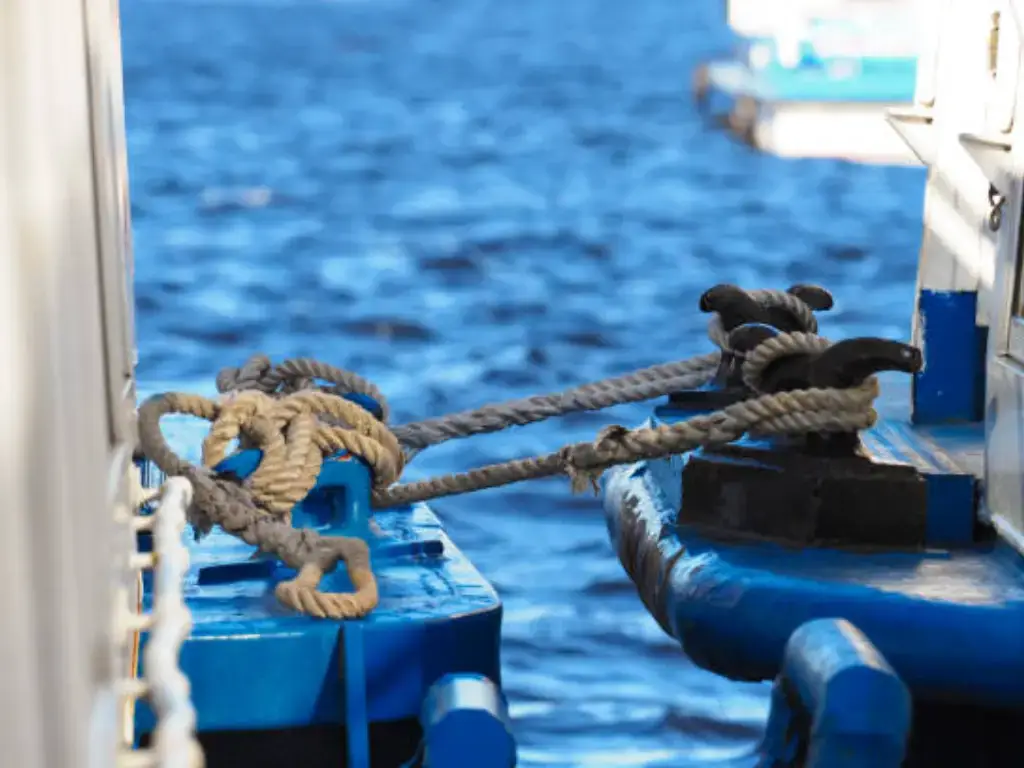
- Befestigen Sie die Ankerleinen am Dock: Die Ankerleinen sollten zum Schwimmdock gezogen und an den richtigen Stellen wie Klampen oder Ösen befestigt werden. Um eine Abnutzung der Leinen zu vermeiden, sollte man Kauschen verwenden und darauf achten, dass die Last gleichmäßig verteilt ist.
- Befestigen Sie das Dock an den Verankerungen: Lösen Sie die Spannung der Ankerleinen mit Hilfe von Winden oder anderen Vorrichtungen, die für diesen Zweck vorgesehen sind. Sie sollten so weit gespannt sein, dass sich das Dock nicht stark bewegt, aber auch nicht zu stark, so dass das Dock oder die Anker stark belastet werden.
- Testen Sie die Stabilität: Sobald das Boot verankert ist, vergewissern Sie sich, dass die Schwimmkörper sicher sind, indem Sie Druck auf das Schwimmdock ausüben. Vergewissern Sie sich, dass der Steg gut verankert und stabil ist, damit er bei der Benutzung nicht schwankt.
Technische Vertiefung: Berechnung des Ankerumfangsverhältnisses
Um sicherzustellen, dass ein Schwimmdock auch bei Wellengang sicher bleibt, ist es wichtig, das richtige Verhältnis zwischen der Länge der Ankerleine und der gesamten vertikalen Strecke, die sie zurücklegen muss, zu verwenden.
Die Ankerlängenformel
Verwenden Sie die folgende Formel, um die erforderliche Mindestlänge für jede einzelne Verankerungsleine zu bestimmen:

- L: Erforderliche Länge der Ankerleine (Kette oder Seil).
- Dmax: Die maximale Wassertiefe bei Hochwasser oder dem Höchststand des Stausees.
- H-Welle: Die maximale vorhergesagte Wellenhöhe bei Sturm.
- C: Der Umfangskoeffizient (bestimmt durch die Wahl des Materials).
Standardumfang Koeffizienten (C)
Der Koeffizient variiert je nach Gewicht und Elastizität der Materialien. Schwerere Materialien erzeugen eine "Oberleitungskurve", die wie ein natürlicher Stoßdämpfer wirkt.
| Rode Material | Empfohlenes Verhältnis (C) | Funktionale Logik |
| All-Chain (verzinkt) | 3:1 | Das schwere Gewicht hält den Zug auf den Anker horizontal und sorgt dafür, dass er im Boden bleibt. |
| Hybrid (Kette + Seil) | 5:1 | Erfordert mehr Länge, damit der Zugwinkel für den leichteren Seilabschnitt niedrig bleibt. |
| All-Seil (Nylon/Poly) | 7:1 | Erforderlich für leichte Docks, um das fehlende Gewicht der Leine auszugleichen. |
Ein strategisches Umfangsmanagement minimiert effektiv die vertikale Belastung und die Ermüdung der Hardware. Ein häufiger Fehler ist die Verwendung eines zu engen Verhältnisses (z. B. 1:1). Wenn der Wasserstand steigt oder eine große Welle auftritt, zwingt eine zu enge Leine das Dock dazu, direkt nach oben am Anker zu ziehen, wodurch Schäkel brechen oder schwere Betonblöcke aus ihrer Position gezogen werden können. Durch die Beibehaltung eines Verhältnisses von 3:1 oder 5:1 kann sich das Dock durch den "Durchhang" in der Kette vertikal mit dem Wasser heben, während die horizontale Kraft auf den Anker minimal bleibt, was ein Abdriften verhindert.
Praktische Lösungen für Lärm-, Eis- und Wasserstandsmanagement
Um den Stegbesitzern ein angenehmeres Erlebnis zu bieten und die langfristige Funktionsfähigkeit zu gewährleisten, ist es notwendig, sich mit Wartungs- und Umweltfragen zu befassen. Im Folgenden finden Sie eine technische, klare Aufschlüsselung der Lösungen für Lärm, Eis, Wasserstand und Umweltschutz.
Geräuschlose Verankerung: Wie man das Kettenquietschen beseitigt
Die hochfrequente Metall-auf-Metall-Reibung verursacht das schrille Geräusch von Metallketten, die an Stahlbügeln reiben. Um dies zu verhindern, werden an der Stelle, an der die Kette in die Kettenhalterung des Stegs eintritt, Buchsen aus Polyethylen (PE) oder hochbelastbare Gummidichtungen eingesetzt. Diese Materialien dienen als schwingungsdämpfender Puffer, der für eine geräuscharme Umgebung am Wasser sorgt, ohne die Sicherheit der Verbindung zu beeinträchtigen.
Schutz im Winter: Eishiebe
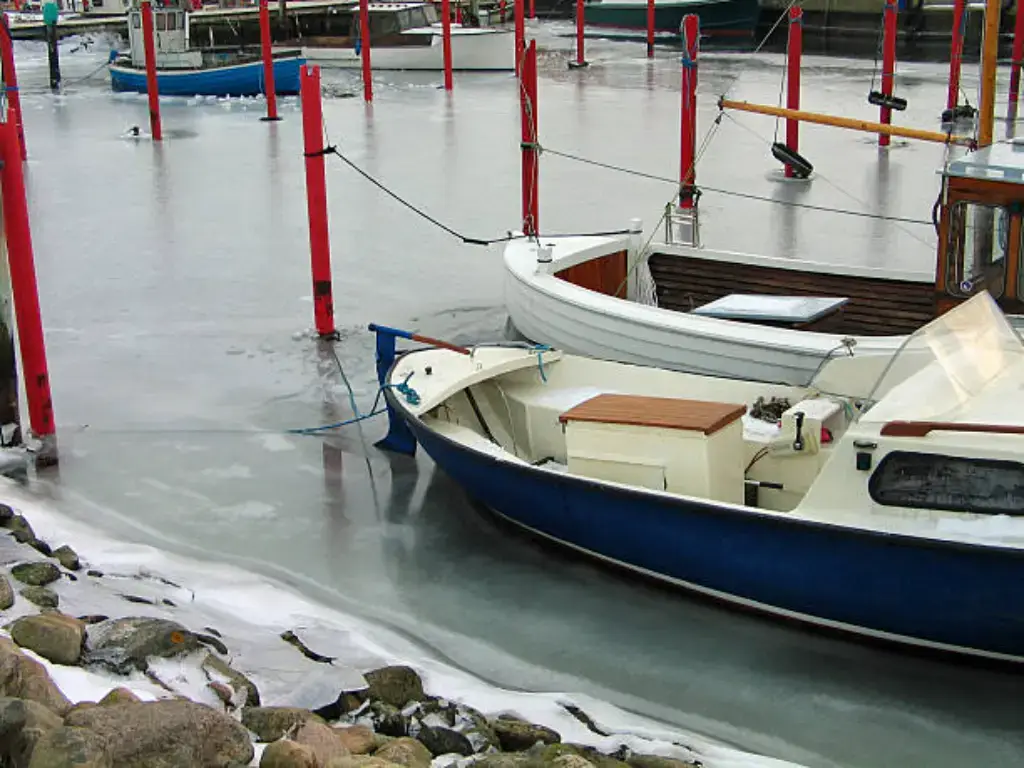
In kälteren Klimazonen führt das wachsende Eis zu Eisgang, der stark genug ist, um Betonanker anzuheben oder Stahlpfähle zu verbiegen. Die Kettenspannung sollte gelockert werden, bevor das Wasser gefriert, damit das Dock auf der Eisoberfläche gleiten kann, um ein strukturelles Versagen zu vermeiden. Bei festen Installationen werden um die Verankerungspunkte herum Enteisungsanlagen oder Sprudler installiert, um durch das Pumpen von wärmerem Bodenwasser einen Kreislauf von offenem Wasser aufrechtzuerhalten, damit sich das Eis nicht an der Struktur festsetzt.
Automatisches Spannen bei häufigem Wasserstandswechsel
Die täglichen Gezeiten- oder Stauseeschwankungen erfordern in der Regel eine manuelle Anpassung der Kette, die arbeitsintensiv ist. Eine automatisierte Alternative ist ein Gegengewicht-Rollen-System, das mit einem schweren Gewicht eine konstante Spannung aufrechterhält. Bei hohem Wasserstand hält die Umlenkrolle die Ketten straff, bei niedrigem Wasserstand nimmt das Gewicht die Spannung auf, so dass der Steg stabil und in einer Linie liegt, ohne dass eine tägliche Wartung erforderlich ist.
Grüne Verankerung: Verringerung des Seebetteffekts
Herkömmliche massive Anker können empfindliche Seegraswiesen und aquatische Lebensräume zerstören. Um die Umweltbelastung zu verringern, sollten statt großer Betonblöcke spiralförmige Schraubanker (Schnecken) verwendet werden. Schneckenanker bieten eine enorme Haltekapazität und haben eine Standfläche von nur wenigen Zentimetern, wodurch der Seeboden nur minimal gestört wird. Darüber hinaus wird das lokale Ökosystem durch die strategische Positionierung der Ankerfelder geschützt, um empfindliche Mähverbotszonen zu vermeiden.
Leitfaden zur Langlebigkeit: Wartung und Fehlersuche
Ein Verankerungssystem ist ein bewegliches mechanisches System, das aktiv gewartet werden muss, um den Elementen zu widerstehen. Um langfristig stabil zu sein, sollten Sie diese Richtlinien befolgen:
- Die jährliche Unterwasserinspektion: Führen Sie einmal im Jahr eine umfassende Inspektion der Schäkel und der ersten fünf Meter der Kette in der Nähe des Seegrundes durch. Hier entsteht die aggressivste Korrosion durch eine chloridreiche Umgebung und die Reibung des Sediments. Bei schlechten Sichtverhältnissen ist es ratsam, bei Tiefwasseranlagen einen Berufstaucher hinzuzuziehen.
- Spannung der Kette: Wenn Sie feststellen, dass sich Ihr Steg zu neigen beginnt oder aus der Mitte gerät, ist dies ein gutes Anzeichen für eine ungleichmäßige Spannung. Gleichen Sie die Last mit Spannschlössern aus oder spannen/lockern Sie die Ankerleinen von Hand. Eine korrekte Ausrichtung verhindert eine strukturelle Belastung des Stegrahmens bei schwankenden Wasserständen.
- Die 20-Prozent-Regel der Verdrängung: Überprüfen Sie alle Beschläge, wie Ketten, Anker und Verbindungsstücke, um festzustellen, ob sie strukturell dünn sind. Wenn ein Kettenglied mehr als 20 Prozent seines ursprünglichen Durchmessers durch Rost oder Abnutzung verloren hat, hat es seinen kritischen Punkt erreicht. Diese Teile sollten so bald wie möglich ausgetauscht werden, um ein katastrophales Versagen im Falle eines Sturms zu verhindern.
- Prüfungen nach einem Unwetter: Überprüfen Sie die Spannung und Positionierung schnell nach schwerem Wetter oder stark frequentierten Wochenenden. Die frühzeitige Erkennung eines losen Schäkels oder eines leicht verschobenen Ankers kann den teuren Preis einer kompletten Systemumstellung sparen.
Obwohl die Hardware gewartet werden muss, ist ein robustes Hisea Dock so konzipiert, dass es mit Ihrem Verankerungssystem zusammenarbeitet, um eine langfristige Stabilität zu gewährleisten.
Wie man ein Schwimmdock verankert, um so zuverlässig wie möglich zu sein: Hisea Dock Engineering Standard
Die Verankerung erfordert eine Plattform, die in der Lage ist, den physikalischen Kräften standzuhalten, an denen sie verankert wird. Hisea Dock beschäftigt sich seit 2006 mit modularen Hochleistungssystemen, die diesen technischen Anforderungen gerecht werden sollen. Unsere Module sind so konzipiert, dass sie die Energie der Wellen absorbieren, anstatt sie zu reflektieren. Deshalb werden sie aus einer neuen Generation von HDPE mit hohen UV-Zusätzen hergestellt, was die dynamische Belastung Ihrer Ketten und Anker erheblich verringert.
Unser Design basiert auf struktureller Integrität. Hisea Dock verfügt über 19 mm dicke, verstärkte Verbindungsösen und wurde ausgiebig getestet, um einer diagonalen Spannung von 14.389 N standzuhalten. Dies stellt sicher, dass Ihre Ankerpunkte auch bei starkem Wellengang oder sogar bei Frost im Winter sicher sind - unser spezielles Auftriebsdesign ermöglicht es dem Dock, sicher auf dem Eis zu schwimmen.
Zusätzlich zu den Beschlägen bieten wir auch maßgeschneiderte Verankerungspläne und vollständige Installationsanweisungen an, um Rätselraten zu vermeiden. Hisea Dock hat eine 5-Jahres-Garantie und hält 20-30 Jahre länger als der Branchendurchschnitt, was die komplexe Aufgabe der Verankerung zu einer sicheren, wartungsarmen Lösung für jedes Hafenviertel macht.
Kostenvergleich: DIY-Budget und professionelle Installation
Die Kosten für die Verankerung geben Ihnen ein klares Bild davon, wie Sie Ihr Budget planen und gleichzeitig sicherstellen können, dass Ihr Schwimmsteg langfristig sicher ist. Bei der nächsten Aufschlüsselung werden der Bedarf an Hardware und die logistischen Kosten für die Installation unterschieden.
Aufschlüsselung der Materialkosten
Unabhängig von der Einbaumethode ist qualitativ hochwertiges, für die Schifffahrt geeignetes Material erforderlich. Die folgende Tabelle enthält eine Schätzung der Gesamtinvestition für eine typische Verankerungsanordnung.
| Artikel | Spezifikation | Stückpreis (USD) | Menge (Standardeinstellung) | Geschätzte Gesamtkosten |
| Verankerungen | 500 - 1.000 lbs Betonblöcke | $150 - $500 | 2 - 4 Einheiten | $300 - $2.000 |
| Verankerungskette | 3/8″ oder 1/2″ G43 Verzinkt | $7 - $15 / ft | 100 - 200 Fuß | $700 - $3.000 |
| Seile/Kabel | Marine-grade Nylon/Polyester | $2 - $5 / ft | 50 - 100 Fuß | $100 - $500 |
| Hardware-Bausatz | Schäkel, Drehwirbel, Kauschen | $200 - $600 | 1 vollständiger Satz | $200 - $600 |
| ZUSAMMENFASSUNG | Nur Hardware | $1,300 - $6,100 |
Installationskosten: Heimwerker vs. professionelle Installation
Der Hauptgrund für die Preisunterschiede sind die Ausrüstung und die Fachkräfte, die benötigt werden, um die schweren Anker korrekt auf dem Meeresboden zu positionieren.
| Kostenkategorie | DIY-Installation (Budget) | Professionelle Installation (Full Service) |
| Vermietung von Ausrüstung | Kleiner Lastkahn/Ponton: $300 - $700 | Lastkran / Arbeitsboot: Eingeschlossen |
| Arbeit und Fachwissen | $0 (Erfordert 3+ starke Arbeiter) | Kommerzielle Taucher & Crew: $1.500 - $5.000 |
| Technische Verifizierung | Manuelle Tiefenlotung / visuell | Sonar und Unterwasservideo: Inklusive |
| Genehmigungen & Gebühren | Eigenhändig: $100 - $500 | Bauunternehmer-gefertigt: $100 - $500 |
| GESAMTARBEITSKOSTEN | $400 - $1.200 | $1.600 - $5.500+ |
ROI-Beratung: Warum professionelle Installation kostensparend ist
Obwohl die anfänglichen Kosten für die Beauftragung eines Teams höher sind, kann eine professionelle Installation bei der langfristigen Nutzung des Stegs, insbesondere unter rauen Bedingungen, wirtschaftlicher sein.
- Genauigkeit und Konsistenz: Bei Selbstbauinstallationen besteht das Problem der Ankerverschiebung, bei der die Anker aufgrund von Wasserströmungen nicht an der richtigen Stelle platziert werden. Ein professionelles Kranschiff sorgt dafür, dass die Anker genau platziert werden und die Spannung nicht ungleichmäßig ist, was dazu führen kann, dass sich der Stegrahmen verzieht oder die Halterungen im Sturm brechen.
- Kontrolle des Meeresbodens: Professionelle Taucher überprüfen, dass die Anker nicht auf instabilen Felsvorsprüngen liegen oder zu tief im "Zuckersand" oder Schlamm vergraben sind. Ein umgestürzter Anker kann mehr als 10.000 Dollar an Notreparaturen am Dock verursachen.
- Sicherheit in tiefen Gewässern: Es ist unsicher, mit 1.000-Pfund-Blöcken und schweren Stahlketten ohne hydraulische Winden zu arbeiten. Das Risiko von Sach- und Personenschäden wird durch professionelle Teams ebenfalls verringert, was ein entscheidender Faktor für die Haftpflichtversicherung ist.
- Langfristige Beständigkeit: Ein professionell eingestelltes System minimiert die Reibung an Schäkeln und Ketten. Diese "Set it and forget it"-Strategie erhöht normalerweise den Wartungszyklus von alle 2 Jahre auf alle 5-10 Jahre.
Bei einer kleinen Anlegestelle in einem flachen, ruhigen See ist der Selbstbau eine kostengünstige Alternative. In tiefen Gewässern, stark frequentierten oder sturmgefährdeten Gebieten bietet ein professionelles Team jedoch ein gewisses Maß an Sicherheit, das sich in Bezug auf Wartung und Vermögensschutz selbst bezahlt macht.
Schlussfolgerung
Die Verankerung eines Schwimmdocks ist eine Investition in Ihre zukünftige Immobilie am Wasser. Mit der richtigen Methode, sei es die starke Stabilität von Pfählen oder die anpassungsfähige Kreuzkettenkonstruktion, und der Verwendung von hochwertigen Materialien, wie sie von Hisea Dock angeboten werden, verwandeln Sie eine bloße Plattform in eine dauerhafte maritime Struktur.
Der Schlüssel zum Erfolg dieses Vorhabens liegt in der Konvergenz von hochwertiger HDPE-Technik und rigorosen Installationsgewohnheiten. Wenn Sie ein System kaufen, das UV-beständig und schlagfest ist und eine 5-Jahres-Garantie hat, kaufen Sie kein Dock, sondern Seelenfrieden.
FAQS
F: Wie kann man ein Schwimmdock stabilisieren?
A: Ein Schwimmdock wird mit einer Mischung aus vertikalen Pfählen, schweren Ankerketten oder steifen Auslegersystemen verankert, um die seitliche Bewegung zu begrenzen, aber das Dock mit dem Wasserspiegel steigen und fallen zu lassen. Das Schwanken und Kippen wird auch durch die Vergrößerung der Oberfläche durch die Verbindung mehrerer Module und die Aufrechterhaltung einer angemessenen Spannung in den Verankerungsleinen stark minimiert.
F: Wie hoch ist das Gewicht für die Verankerung eines Schwimmdocks?
A: Für Standard-Wohnstege ist ein Gewicht zwischen 225 und 450 kg (500 und 1.000 lbs) pro Ankerpunkt erforderlich. Die genaue Menge richtet sich nach der Grundfläche des Stegs, der maximalen örtlichen Windgeschwindigkeit und der Strömung des Wassers. Als Faustregel gilt, dass das Gewicht dem 1,5- bis 2-fachen der berechneten maximalen Seitenkraft entsprechen sollte, die durch die Umweltfaktoren verursacht wird.
F: Was ist die 7:1-Ankerregel?
A: Der Ankerumfang ist das Verhältnis zwischen der Länge der Ankerleine (Leine) und dem vertikalen Abstand zwischen dem Meeresboden und dem Bug des Bootes und wird als 7:1-Regel bezeichnet. Für jeweils 1 Fuß Wassertiefe (und den Abstand zwischen Wasser und Deck) müssen Sie 7 Fuß Leine auswerfen, damit der Anker horizontal gezogen wird und sich in den Meeresboden einschneidet.
F: Auf welcher Seite des Bootes ankern Sie nie?
A: Sie dürfen ein Boot niemals am Heck (dem hinteren Teil) rudern. Die Verankerung am Heck ist riskant, da das Heck des Bootes normalerweise durch den Motor und den niedrigeren Heckspiegel schwerer ist. Wenn Wellen oder Strömung auf das Heck treffen, kann das Boot leicht überschwemmt werden und kentert oder sinkt sehr schnell.