Préface
Le charme du front de mer est généralement caractérisé par son calme, mais comme le savent tous ceux qui ont déjà eu affaire à une propriété en bord de mer, l'eau n'est jamais calme. Un quai flottant est un investissement important - une porte d'entrée pour les loisirs, une plate-forme pour le commerce et un pont entre la terre et le monde de l'eau. Mais son utilité dépend de sa stabilité. Un quai mal ancré n'est pas seulement une nuisance, mais une responsabilité qui peut entraîner l'effondrement de la structure, des dommages aux biens et même des accidents.
L'ancrage des quais flottants est un exercice d'ingénierie structurelle et d'évaluation environnementale. Il exige un compromis entre les exigences strictes de la construction terrestre et la nature fluide et imprévisible de l'eau. Afin de faire d'un quai une ressource stable pendant des décennies, il est nécessaire de comprendre les forces en jeu, notamment le vent, le courant, la flottabilité et le frottement, et de les gérer en utilisant les bons matériaux et les bonnes techniques. Un quai flottant est comme un navire sans équipage et, s'il n'est pas ancré avec soin et prévoyance, il est à la merci des éléments.
Qu'est-ce qu'un quai flottant ?
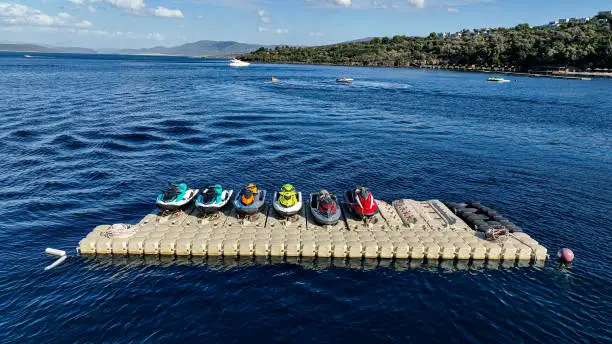
Un quai flottant est une plate-forme portable et flexible qui repose sur l'eau et dont la hauteur varie en fonction du niveau de l'eau. Contrairement aux quais fixes qui sont construits pour être installés sur le rivage ou au fond de la mer, les quais flottants sont construits pour se déplacer avec les courants d'eau et sont utilisés avec une passerelle ou une rampe avec des mains courantes pour la stabilité et une charnière de raccordement pour la rampe. Ces quais sont également conçus pour résister à la rouille et à la corrosion, ce qui signifie qu'ils constituent une solution durable pour l'accès aux quais.
Les quais flottants sont généralement fabriqués à partir de matériaux légers et robustes tels que l'aluminium, le plastique ou le bois, et flottent sur des matériaux flottants tels que la mousse ou des fûts remplis d'air. Ils peuvent être conçus sous différentes formes et dimensions en fonction du type de bateaux et d'activités nautiques qui se dérouleront au bord de l'eau. Afin d'éviter que le quai flottant ne s'éloigne du rivage, il est nécessaire de le fixer correctement à l'aide d'un système d'ancrage efficace tel que le kit de quai flottant qui est fourni avec des planches, des maillons rapides et des boulons à œil.
Avantages d'un bon ancrage des quais
L'ancrage adéquat d'un quai flottant présente de nombreux avantages pour assurer sa stabilisation. Le premier avantage d'un quai bien ancré est qu'il devient plus stable. Cela signifie que lorsque le quai est fixé au fond du plan d'eau, il ne peut pas être facilement déplacé ou secoué par le vent, les vagues ou les bateaux.
Un ancrage approprié joue également un rôle crucial dans la protection de votre quai flottant contre tout dommage pouvant être infligé par les intempéries ou les vagues. Lorsqu'un quai est bien fixé à l'aide d'un système d'amarrage flottant, il est en bonne position pour contrer les forces de la nature afin de ne pas être endommagé ou arraché à la rive. En outre, un quai bien établi offre aux utilisateurs une zone de travail sécurisée, ce qui réduit les risques d'accident ou de blessure lors de l'embarquement ou du débarquement des bateaux.
Quel est l'impact des conditions météorologiques et des variations du niveau de l'eau sur le processus d'ancrage ?
Les conditions météorologiques et les variations du niveau de l'eau ont une grande influence sur le processus d'ancrage et la longévité du quai flottant. Des conditions telles que des vents violents, des courants forts et de grosses vagues peuvent accroître la pression sur le système d'ancrage, ce qui peut endommager le quai ou même le déplacer. Dans les régions où les ouragans ou les ondes de tempête sont fréquents, il peut être nécessaire de sortir le quai de l'eau ou d'améliorer le système d'ancrage pendant ces périodes pour le soutenir.
La fiabilité de l'ancrage est également déterminée par le substrat subaquatique :
- Le rocher : Stable, mais non pénétrant ; la seule solution possible dans ce cas est le poids mort basé sur la gravité.
- Le sable : Les tarières à vis sont les mieux adaptées au sable, qui offre une bonne aspiration et une bonne résistance mécanique.
- Limon/boue : Offre une faible résistance ; les ancrages dans ces fonds meubles sont susceptibles de ramper et ont besoin de bases plus larges ou d'un poids plus important.
Il est également possible de laisser une longueur de chaîne supplémentaire pour permettre au quai de monter et de descendre en cas de changement du niveau de l'eau. Dans les grandes étendues d'eau, il peut s'avérer nécessaire d'appliquer du matériel supplémentaire comme une tension de chaîne suffisante pour garantir que le quai reste ancré.
Lorsque vous aménagez votre quai, pensez aux conditions météorologiques et à l'état de l'eau dans votre région, au type d'ancrage le plus efficace face à ces forces et au type d'ancrage le plus approprié, qu'il s'agisse de trous d'ouragan ou de systèmes d'ancrage renforcés, ainsi qu'à la longueur de chaîne appropriée.
Réglementation environnementale pour l'ancrage des quais
Lors de l'ancrage de quais flottants, certaines lois et normes environnementales doivent être respectées afin de minimiser les effets sur l'environnement. En ce qui concerne la conservation de l'habitat, il faut éviter de placer les ancres et les pieux de battage de manière à perturber les habitats aquatiques et les zones de reproduction des poissons. En outre, le type de matériau utilisé dans la construction des quais et des systèmes d'ancrage, tel que le matériau de pontage, doit également être respectueux de l'environnement afin de minimiser les risques de pollution de l'eau par des matériaux toxiques.
En termes de conformité légale, dans la plupart des juridictions, des permis sont requis avant l'installation d'ancres ou de pieux sur les fonds publics. Ces structures doivent souvent être approuvées par des agences telles que l'Army Corps of Engineers (États-Unis) ou les conseils maritimes locaux, afin de s'assurer qu'elles n'entravent pas la navigation et qu'elles ne portent pas atteinte aux droits des riverains. Il est nécessaire de consulter les bureaux locaux de zonage à un stade précoce, car les installations illégales peuvent donner lieu à des amendes élevées, voire à l'expulsion.
Un autre facteur important à prendre en compte est l'emplacement des quais et des ancres qui ne doivent pas interférer avec les voies navigables et qui peuvent être potentiellement dangereux pour les utilisateurs. Enfin, il faut tenir compte de l'impact des structures sur le littoral et éviter de les installer dans des zones sujettes à l'érosion ou contenant des environnements sensibles au littoral.
Le meilleur système d'ancrage : Guide de décision en 2 étapes
Le choix d'une technique d'ancrage est un compromis entre les conditions de l'eau et le matériau du quai. Utilisez ce raisonnement pour obtenir l'arrangement le plus sûr de votre projet.
Étape 1 : Évaluer votre environnement
La logique mécanique de vos ancres est déterminée par les conditions de l'eau.
- Dans Conditions extrêmes et zones de marée : L'étalon-or est l'ancrage sur pieux. Lorsque les vagues sont fortes, que les vents sont violents ou que l'eau monte et descend continuellement, vous pouvez faire enfoncer des pieux dans le lit de l'eau et vous disposez alors d'un rail vertical permanent sur lequel vous pouvez installer votre quai. C'est la méthode la plus stable et elle doit être installée par un professionnel.
- Pour les eaux profondes (>30 ft) : Le poids mort et la chaîne sont la norme dans l'industrie. Dans les cas où l'eau est trop profonde pour permettre l'installation de pieux, de lourds blocs de béton (poids morts) s'appuient sur la gravité et sur un système de chaînes croisées pour offrir une stabilité latérale sans restriction de profondeur. Contrairement aux systèmes linéaires instables, lorsque les chaînes sont croisées à 45 ou 60 degrés, la tension géométrique est créée pour fixer la position du quai. Le plus important est de laisser 5 à 10 % de mou pour permettre au système de s'élever en toute sécurité avec les marées ou les vagues sans casser le matériel, et des connexions multipoints sont utilisées pour répartir les charges environnementales afin d'éviter de surcharger les composants modulaires.
- Canaux étroits et digues : Supports pour bras raides/murs de mer : Ils sont similaires à une attache mécanique. Ils sont idéaux pour maintenir un quai à une distance constante dans la rivière ou les canaux afin qu'il ne dérive pas vers la rive.
- Dans le cas des étangs calmes et peu profonds : Le système de tuyaux et de manchons est le plus facile à bricoler. Lorsque la hauteur d'eau est inférieure à 3 mètres et que le fond est mou, des tuyaux métalliques simples enfilés dans des manchons sont suffisamment stables pour un faible coût.
Le mouvement du quai est déterminé par la dynamique de l'eau, mais la géologie du fond détermine l'adhérence finale de votre système. La compatibilité de la géologie de votre site peut être déterminée à l'aide de la matrice suivante :
| Type de substrat | Méthode d'ancrage recommandée | Logique mécanique | Principales considérations |
| Solid Rock / Bedrock | Poids mort (basé sur la gravité) | Elle repose uniquement sur la masse et le frottement. | Peut nécessiter 20%-30% un poids supplémentaire pour éviter le glissement. |
| Sable / sédiments fermes | Tarières hélicoïdales / Ancres de terre | Fonctionne comme une vis, en utilisant la tension mécanique et l'aspiration. | L'installation en eaux profondes nécessite souvent l'intervention de plongeurs professionnels. |
| Limon / Boue meuble | Palplanches profondes ou poids mort à large base | Les pieux doivent atteindre une "couche portante". Les poids ont besoin d'une large empreinte. | Les ancres ont tendance à "ramper" sous l'effet de charges de vent soutenues. |
| Argile | Piles ou tarières à usage intensif | L'argile offre un excellent soutien latéral et une grande adhérence pour les fils. | L'installation nécessite beaucoup de travail ; il faut des enfonceurs de pieux très puissants. |
| Graviers / pavés | Chaîne lourde et poids mort | Les surfaces irrégulières favorisent l'accrochage des blocs et des chaînes lourds. | Les tarières sont difficiles à installer car elles peuvent heurter de grosses pierres. |
Étape 2 : Adapter la méthode à votre matériau de quai
Le matériau et la construction de votre quai déterminent sa capacité à résister au stress physique de l'ancrage. Les différents types de quais ont besoin d'un soutien et d'une flexibilité plus ou moins importants.
- Quais flottants en aluminium
Ancrage : Généralement fixé par des pieux, des bras rigides ou des ancres à poids mort. On peut fixer le quai au fond de l'eau en enfonçant des pieux dans le sol. Une paire de bras rigides qui s'étend du quai à la rive empêche le mouvement latéral du quai. Les ancrages à poids mort s'appuient sur la masse d'objets volumineux (par exemple, des blocs de béton et d'autres structures pour maintenir le quai à sa place).
- Quais flottants en bois
Ils sont parfois fixés au moyen de pilotis, de chaînes d'ancrage ou de câbles. Ils peuvent être martelés dans le fond de l'eau afin d'assurer un bon support au quai. Pour éviter la dérive, le quai est ancré à la rive ou à des ancres lourdes au fond de l'eau par des chaînes ou des câbles.
- Quais flottants modulaires en plastique
Il est généralement amarré à l'aide de pilotis, de chaînes ou d'ancres à poids mort. Ils peuvent être enfoncés dans le fond de l'eau pour assurer une bonne fondation et une bonne stabilité au quai modulaire, et le matériau utilisé est le plastique. Ils peuvent relier le quai à la rive ou à des ancres lourdes au fond de l'eau. Les ancres à poids mort sont des ancres qui s'appuient sur le poids de l'objet pour empêcher le quai de flotter.
- Quais flottants en béton
Il est généralement amarré à l'aide de pilotis ou d'ancres à poids mort. Les pieux en béton peuvent être enfoncés dans le fond de l'eau pour garantir que le quai repose sur une base solide. Les ancres à poids mort s'appuient sur la masse des blocs de béton pour maintenir le quai en position et l'empêcher de dériver.
- Quais flottants gonflables
Il est parfois fixé à l'aide de cordes, de chaînes d'ancrage ou de petites ancres. Pour ce faire, on peut utiliser des cordes ou des chaînes d'ancrage qui aideront à fixer le quai gonflable à certaines ancres sur le rivage ou au fond du plan d'eau. Les moyens temporaires d'ancrage consistent à jeter des objets dans l'eau (tels qu'un grappin ou des ancres en forme de champignon).
- Docks flottants à tuyaux
Généralement, il est amarré par des pilotis, des chaînes d'ancrage ou des ancres de portance. Les piliers en tuyau peuvent être enfoncés dans le fond de l'eau pour soutenir le quai. Il peut s'agir d'un lien direct entre le quai et le rivage ou d'ancres lourdes au fond de l'eau. Les ancres à poids mort utilisent des poids sous forme d'objets massifs pour sécuriser le quai.
L'ultime matrice de décision en matière d'ancrage
| Méthode d'ancrage | Meilleur environnement | Aptitude à la profondeur | Type d'installation | Permis et impact environnemental | Résistance à l'hiver et au verglas | Fréquence d'entretien | Meilleure adéquation des matériaux | Coût initial |
| Pilotis | Vents violents, vagues et trafic maritime intense | Jusqu'à 30 pieds | Professionnel (nécessite un enfonceur de pieux) | Grande complexité ; structure permanente avec perturbation du fond marin. | Médiocre ; risque de "ice jacking" en tirant les piles hors du lit. | Très faible | Béton, bois, aluminium | Haut |
| Poids mort et chaîne | Eaux profondes ou lits de lacs rocheux | Illimité | Modéré (nécessite un bateau/une péniche) | Modéré/faible ; considéré comme temporaire/mobile avec un impact minimal sur le lit. | Excellent ; les chaînes peuvent être détendues ou enlevées pour éviter les dommages causés par la glace. | Moyen (vérification annuelle de la chaîne) | Quais modulaires en PEHD, en bois, en tuyaux | Modéré |
| Stiff Arm / Seawall | Rivières, canaux étroits ou rivages escarpés | N/A (à terre) | Modéré (bricolage possible) | Faible ; construction à terre avec un impact sous-marin négligeable. | Modéré ; il est recommandé de se déconnecter pendant les périodes de forte glace. | Faible | Aluminium, HDPE Modulaire | Modéré |
| Tuyaux et manchons | Étangs calmes et peu profonds ou lacs privés | Moins de 10 pieds | Ami des bricoleurs | Très faible ; non permanent, léger et généralement sans permis. | Bon ; les tuyaux sont facilement démontables pour l'hivernage. | Moyen (Ajuster en fonction du niveau de l'eau) | HDPE Modulaire, petit aluminium | Faible |
Pour choisir le meilleur ancrage, vous devez d'abord analyser votre environnement. Les pieux professionnels doivent être utilisés là où la stabilité est maximale, dans les zones à fort trafic ou dans les zones de marée. En eaux profondes (plus de 30 pieds), la meilleure norme industrielle est le poids mort et la chaîne. Un bras rigide est utilisé dans les chenaux étroits pour maintenir une distance précise entre les rives. La technique du tuyau et du manchon est une approche relativement peu coûteuse, à réaliser soi-même, pour les étangs peu profonds et calmes. Enfin, le système doit être adapté au matériau de votre quai afin de garantir une durée de vie maximale et une contrainte structurelle minimale.
Le matériel nécessaire à l'ancrage d'un quai flottant est basique
La longévité de votre quai flottant dépend de la sélection de matériaux qui résistent aux forces hydrauliques constantes et aux conditions corrosives. Le tableau suivant classe les éléments clés, de la fondation au plus petit joint de sécurité, nécessaires à la construction d'un système d'ancrage de qualité professionnelle, afin de vous aider à planifier votre construction.
| Catégorie | Composant | Matériaux et spécifications | Meilleur cas d'utilisation |
| Matériaux métalliques de base | Métaux de base | Galvanisé par immersion à chaud (HDG), acier inoxydable 316, aluminium marin | HDG pour les chaînes lourdes ; 316 SS pour les fixations en eau salée ; aluminium pour les cadres structurels. |
| Ancrage des fondations | Poids morts | Blocs de béton | Ancrage traditionnel par gravité pour les eaux profondes. |
| Ancres de terre | Tarières métalliques / Vis hélicoïdales | Adhérence mécanique élevée dans les fonds lacustres sablonneux ou boueux. | |
| Piles | Tubes d'acier ou pieux en bois | Entraînement vertical pour une stabilité permanente maximale. | |
| Connecteurs flexibles | Chaîne d'ancrage | Chaîne galvanisée | Utilise son poids pour créer une "tension caténaire", agissant comme un tampon naturel. |
| Câble métallique | Câble en acier inoxydable | Haute résistance à la traction ; doit être utilisé avec des cosses pour éviter l'effilochage. | |
| Corde synthétique | Nylon / Polypropylène | Amarrage léger ou temporaire pour les petites plates-formes. | |
| Tension et réglage | Treuils | HDG ou acier inoxydable | Utilisé pour la configuration initiale et les ajustements saisonniers du niveau de l'eau. |
| Ressorts d'amortisseurs | Ressorts tampons robustes | Absorbe l'énergie cinétique soudaine des vagues pour protéger le cadre du quai. | |
| Tendeurs | HDG / Acier inoxydable | Fournit des micro-réglages pour éliminer les petites oscillations ou le "mou". | |
| Système "Joints | Manilles | HDG / 316 SS (type Safety-Bolt) | Le lien principal entre les ancres, les chaînes et le quai. |
| Retenues de chaîne | Fentes en acier HDG | Monté sur le quai pour verrouiller et sécuriser les chaînes à des longueurs spécifiques. | |
| Matériel de gréement | Dés à coudre et pinces Crosby | Protège les yeux du câble contre les frottements et sécurise les extrémités du câble. | |
| Rouleaux de guidage des piles | Polyuréthane / Acier galvanisé | Essentiel pour les systèmes de pieux afin de permettre un suivi vertical régulier. |
Un système d'ancrage efficace doit présenter un équilibre entre la résistance, la flexibilité et le contrôle de la friction. Alors que les poids morts en béton ou les pieux servent de racine structurelle, la chaîne galvanisée sert de poumon au système et son poids est utilisé pour absorber l'énergie des vagues. L'acier inoxydable 316 doit être utilisé pour les manilles et les fixations en eau salée afin d'éviter les piqûres dues au chlorure. Enfin, les "joints" tels que les rouleaux de guidage des pieux et les cosses sont essentiels pour minimiser les frottements mécaniques. En l'absence de ces accessoires de protection, le mouvement de l'eau finirait par couper les câbles et éroder les supports, entraînant la rupture du système.
Comment ancrer un quai flottant ?
La réparation d'un quai flottant est un processus complexe qui implique un certain nombre d'étapes pour assurer une base solide.
- Évaluer le site : Pour commencer, évaluez l'endroit où vous allez placer votre quai flottant. Parmi les facteurs à prendre en compte, citons la profondeur de l'eau, le type de fond, qu'il soit sablonneux, boueux ou rocheux, et le degré d'exposition aux vents et aux vagues. Ces informations vous aideront à déterminer le système d'ancrage qui convient à votre site.
- Sélectionnez le système d'ancrage : Dans ce cas, il convient de prendre en compte l'évaluation du site et de sélectionner le système d'ancrage le mieux adapté au cas en question. Sélectionnez le bon type d'ancre et de ligne d'ancrage qui fournira la capacité de maintien et la stabilité nécessaires à votre quai flottant.
- Rassembler les outils et les matériaux : Rassemblez tous les outils et matériaux nécessaires à l'ancrage de la structure. Il peut s'agir d'ancres, de lignes d'ancrage, de manilles, de cosses, de treuils et de tout autre matériel nécessaire en fonction de votre type de système d'ancrage.
- Préparer le quai : Avant de procéder à l'ancrage, assurez-vous que le quai flottant est bien construit et qu'il est placé au bon endroit. Vérifiez que tous les joints des sections du quai sont bien fixés et que le quai est bien positionné sur le sol.
- Marquer les points d'ancrage : En fonction de la taille et de la forme du quai, vous devez déterminer l'endroit où vous souhaitez placer les ancres. Ces points doivent être marqués à l'aide de bouées ou de toute autre structure temporaire qui aidera à ancrer la structure.
- Positionner les ancres : Dans ce cas, vous avez besoin d'un bateau ou de tout autre moyen pour transporter les ancres jusqu'aux zones prévues. Descendez lentement les ancres jusqu'au fond et assurez-vous qu'elles sont correctement positionnées et bien enfoncées dans les sédiments. Pour les ancres sur pieux, les ancres doivent être martelées dans le fond de la mer ou du lac à l'aide d'outils appropriés.
- Installer les ancrages : Lorsque les ancres sont installées, fixez les lignes d'ancrage aux ancres à l'aide de manilles ou de toute autre connexion appropriée. Veillez à ce que les connexions soient correctement réalisées et fixées de manière à ce qu'elles ne puissent pas être facilement déconnectées ou ébranlées.
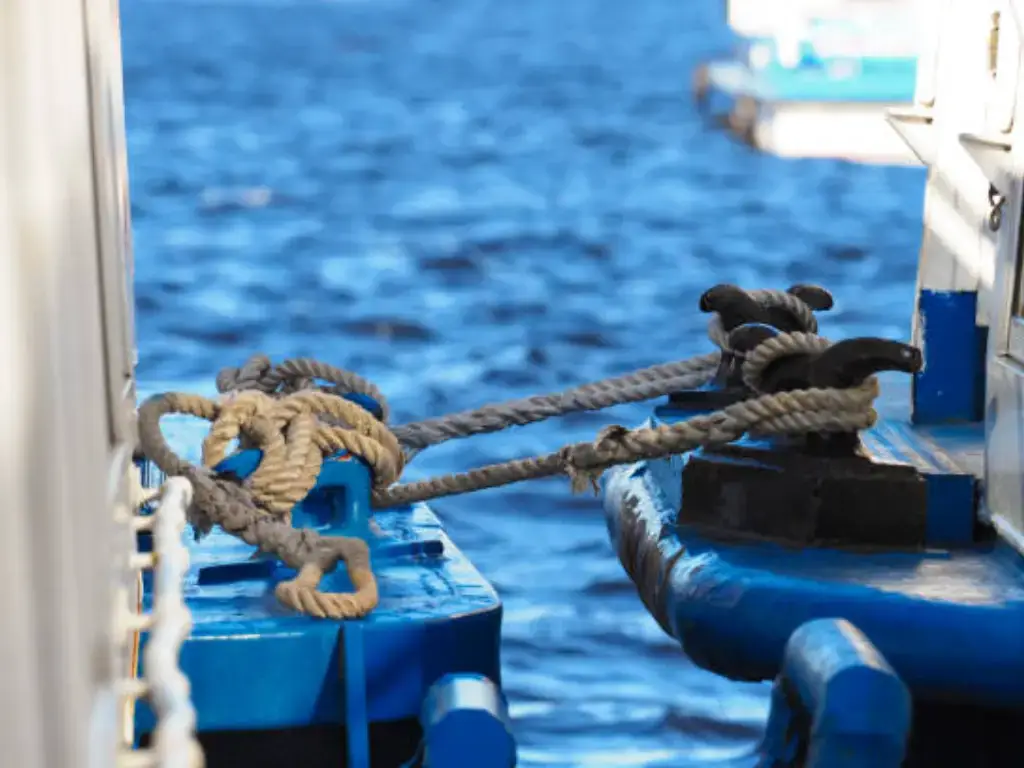
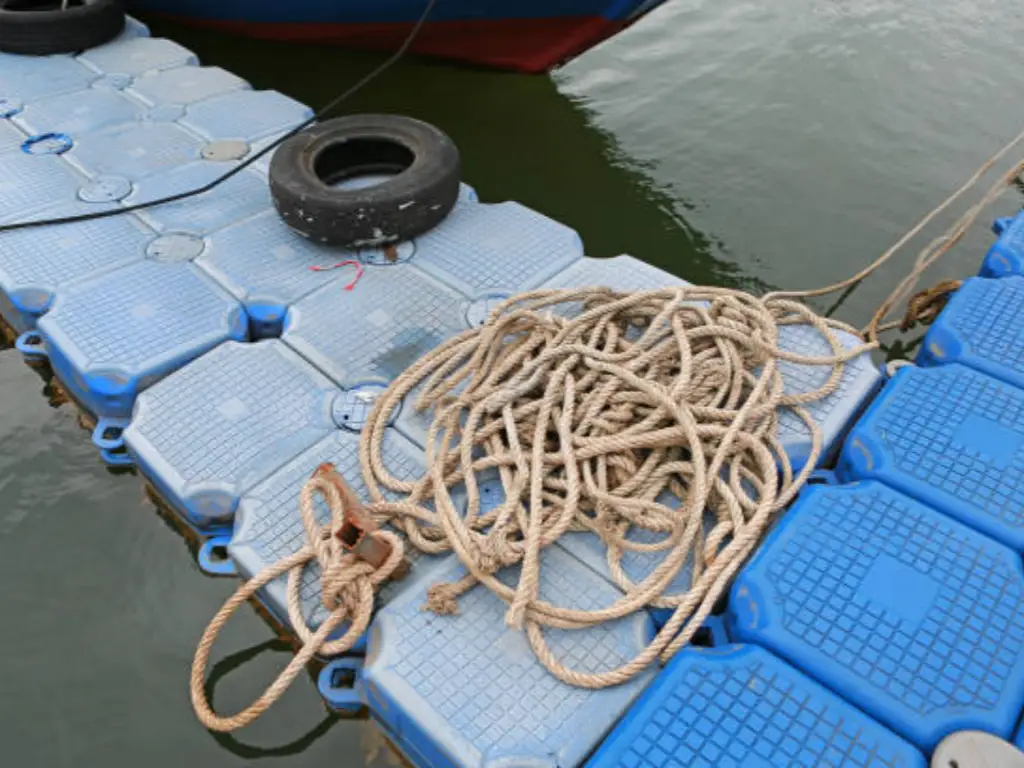
- Attachez les lignes d'ancrage au quai : Les lignes d'ancrage doivent être tirées jusqu'au quai flottant et attachées aux bons endroits, tels que les taquets ou les boulons à œil. Pour éviter l'usure des lignes, il convient d'utiliser des cosses et de veiller à ce que la charge soit uniformément répartie.
- Fixer le quai aux ancres : Relâchez la tension sur les lignes d'ancrage à l'aide des treuils ou d'autres dispositifs conçus à cet effet. Elles doivent être tendues à un niveau tel que le quai ne bouge pas beaucoup, mais en même temps elles ne doivent pas être trop tendues pour que le quai ou les ancres soient soumis à une forte tension.
- Tester la stabilité : Une fois le bateau ancré, assurez-vous que les flotteurs sont bien fixés en exerçant une pression sur le quai flottant. Veillez à ce que le quai soit bien ancré et stable afin qu'il ne vibre pas lorsqu'il est utilisé.
Plongée technique : Calcul du ratio du champ d'application de l'ancre
Pour garantir la sécurité d'un quai flottant en cas de houle, il est essentiel d'utiliser le bon rapport de portée, c'est-à-dire la relation mathématique entre la longueur de votre ligne d'ancrage et la distance verticale totale qu'elle doit parcourir.
La formule de la longueur de l'ancre
Utilisez la formule suivante pour déterminer la longueur minimale nécessaire pour chaque ligne d'ancrage :

- L : Longueur requise du câble d'ancrage (chaîne ou corde).
- Dmax : La profondeur maximale de l'eau à marée haute ou au niveau maximal du réservoir.
- Hwave : La hauteur de vague maximale prévue en cas de tempête.
- C : Le coefficient de portée (déterminé par le choix du matériau).
Coefficients de portée standard (C)
Le coefficient varie en fonction du poids et de l'élasticité des matériaux. Les matériaux plus lourds créent une "courbe caténaire" qui agit comme un amortisseur naturel.
| Matériau de la bague | Rapport recommandé (C) | Logique fonctionnelle |
| Chaîne complète (galvanisée) | 3:1 | Le poids lourd maintient la traction sur l'ancre à l'horizontale, ce qui garantit qu'elle reste ancrée. |
| Hybride (chaîne + corde) | 5:1 | Nécessite plus de longueur pour que l'angle de traction reste faible pour la section de corde la plus légère. |
| Tout en corde (Nylon/Poly) | 7:1 | Nécessaire pour les quais légers afin de compenser le manque de poids de la ligne. |
La gestion stratégique du champ d'application minimise efficacement la charge verticale et la fatigue du matériel. Une erreur courante consiste à utiliser un ratio trop serré (par exemple, 1:1). Lorsque le niveau de l'eau monte ou qu'une grosse vague déferle, une ligne trop serrée oblige le quai à tirer directement vers le haut sur l'ancre, ce qui peut casser les manilles ou entraîner des blocs de béton lourds hors de leur position. En maintenant un rapport de 3:1 ou 5:1, le "mou" de la chaîne permet au quai de se soulever verticalement avec l'eau tandis que la force horizontale sur l'ancre reste minimale, ce qui empêche la dérive.
Solutions pratiques pour la gestion du bruit, de la glace et du niveau d'eau
Afin d'offrir une expérience plus agréable aux propriétaires de quais et de garantir leur fonctionnalité à long terme, il est nécessaire d'aborder les questions de maintenance et d'environnement. Voici une analyse technique claire des solutions concernant le bruit, la glace, les niveaux d'eau et la protection de l'environnement.
Ancrage silencieux : Comment éliminer le grincement de la chaîne
Le frottement métal sur métal à haute fréquence est à l'origine du bruit strident des chaînes métalliques frottant contre les supports en acier. Pour éliminer ce bruit, placez des bagues en polyéthylène (PE) ou des joints en caoutchouc résistant au point où la chaîne entre dans le dispositif de retenue de la chaîne du quai. Ces matériaux servent d'amortisseurs de vibrations, ce qui permet de créer un environnement silencieux au bord de l'eau sans affecter la sécurité de la connexion.
Protection hivernale : Herse de glace
Dans les climats plus froids, la glace croissante forme un soulèvement de la glace, qui est suffisamment puissant pour soulever des ancrages en béton ou plier des piliers en acier. La tension de la chaîne doit être relâchée avant que l'eau ne gèle pour permettre au quai de rouler sur la surface de la glace et éviter une défaillance structurelle. Dans les installations permanentes, des dégivreurs ou des bulleurs sont installés autour des points d'ancrage pour maintenir un cercle d'eau libre en circulation en pompant l'eau de fond plus chaude, de sorte que la glace ne s'accroche pas à la structure.
Tension automatique en cas de changement fréquent du niveau d'eau
Les variations quotidiennes des marées ou des réservoirs nécessitent généralement des ajustements manuels de la chaîne, ce qui demande beaucoup de travail. Une alternative automatisée est un système de poulie à contrepoids qui maintient une tension constante à l'aide d'un poids lourd. Lorsque l'eau est haute, la poulie maintient les chaînes tendues et lorsque l'eau est basse, le poids prend le mou, de sorte que le quai est stable et aligné sans nécessiter d'attention quotidienne.
Ancrage vert : Réduire l'effet de lit de lac
Les ancres massives conventionnelles sont capables de détruire les fragiles herbiers marins et les environnements aquatiques. Pour réduire l'impact sur l'environnement, il convient d'utiliser des ancrages à vis hélicoïdale (tarières) plutôt que de gros blocs de béton. Les tarières offrent une grande capacité de rétention et une empreinte de quelques centimètres seulement, ce qui perturbe le moins possible le lit du lac. De plus, l'écosystème local est préservé grâce au positionnement stratégique des réseaux d'ancrages afin d'éviter la création de zones sensibles non fauchées.
Guide de longévité : Entretien et dépannage
Un système d'ancrage est un système mécanique mobile qui nécessite une maintenance active pour résister aux éléments. Pour être stable à long terme, il convient de suivre les lignes directrices suivantes :
- L'inspection sous-marine annuelle : Une fois par an, procédez à une inspection complète des manilles et des cinq premiers pieds de chaîne à proximité du lit du lac. C'est à cet endroit que la corrosion la plus agressive est produite par les environnements à forte teneur en chlorure et le frottement des sédiments. En cas de mauvaise visibilité, il est conseillé de faire appel à un plongeur professionnel pour les installations en eaux profondes.
- Tension de la chaîne : Si vous constatez que votre quai commence à pencher ou à se décentrer, c'est une bonne indication qu'il y a une tension inégale. Rééquilibrez la charge à l'aide de tendeurs ou serrez/desserrez les lignes d'ancrage à la main. Un alignement correct élimine les tensions structurelles sur le cadre du quai lorsque le niveau de l'eau varie.
- La règle des 20 % de remplacement : Vérifiez l'ensemble du matériel, tel que les chaînes, les ancres et les connecteurs, pour voir s'ils sont structurellement minces. Lorsqu'un maillon de chaîne a perdu plus de 20 % de son diamètre d'origine à cause de la rouille ou de l'usure, il a atteint son point de défaillance critique. Ces pièces doivent être remplacées dès que possible afin d'éviter une défaillance désastreuse en cas de tempête.
- Audits après tempête : Vérifiez la tension et le positionnement rapidement après des conditions météorologiques difficiles ou des week-ends de forte affluence. La détection précoce d'une manille desserrée ou d'une ancre légèrement déplacée peut permettre d'éviter le prix élevé d'un reformatage complet du système.
Bien que la maintenance du matériel soit nécessaire, un dock Hisea robuste est créé pour collaborer avec votre système d'ancrage afin d'assurer une stabilité à long terme.
Comment ancrer un quai flottant pour qu'il soit le plus fiable possible : Norme d'ingénierie des quais Hisea
L'ancrage nécessite une plate-forme capable de supporter les forces physiques auxquelles elle est ancrée. Depuis 2006, Hisea Dock travaille sur des systèmes modulaires de haute performance, destinés à fonctionner en synergie avec ces exigences techniques. Nos modules sont conçus pour absorber l'énergie des vagues au lieu de la refléter, c'est pourquoi ils sont fabriqués à partir d'une nouvelle génération de PEHD avec des additifs à haute teneur en UV, ce qui réduira considérablement la charge dynamique sur vos chaînes et vos ancres.
Notre conception est basée sur l'intégrité structurelle. Hisea Dock possède des oreilles de connexion renforcées de 19 mm d'épaisseur et a été largement testé pour résister à une tension diagonale de 14 389 N. Cela garantit que vos points d'ancrage sont sûrs, même en cas de forte houle ou de gel en hiver - notre conception spéciale de flottabilité permet au dock de flotter en toute sécurité au-dessus de la glace.
En plus du matériel, nous proposons également des plans d'ancrage sur mesure et des instructions d'installation complètes afin d'éliminer les conjectures. Hisea Dock bénéficie d'une garantie de 5 ans et dure 20 à 30 ans de plus que la moyenne du secteur, ce qui fait de la tâche complexe de l'ancrage une solution sûre, nécessitant peu d'entretien, pour n'importe quel front de mer.
Comparaison des coûts : Budget bricolage et installation professionnelle
Les coûts d'ancrage vous donneront une idée claire de la façon de planifier votre budget tout en vous assurant que votre quai flottant est sûr à long terme. La ventilation suivante sépare les besoins en matériel et les coûts logistiques de l'installation.
Ventilation des coûts des matériaux
Quelle que soit la méthode d'installation, il est nécessaire de disposer d'un matériel de haute qualité et de qualité marine. Le tableau suivant est une estimation de l'investissement total d'un dispositif d'ancrage typique.
| Objet | Spécifications | Prix unitaire (USD) | Qté (configuration standard) | Coût total estimé |
| Ancres | 500 - 1 000 lbs Blocs de béton | $150 - $500 | 2 - 4 unités | $300 - $2 000 |
| Chaîne d'ancrage | 3/8″ ou 1/2″ G43 Galvanisé | $7 - $15 / ft | 100 - 200 pieds | $700 - $3 000 |
| Cordes/câbles | Nylon/polyester de qualité marine | $2 - $5 / ft | 50 - 100 pieds | $100 - $500 |
| Kit de quincaillerie | Manilles, émerillons, cosses | $200 - $600 | 1 jeu complet | $200 - $600 |
| SOUS-TOTAL | Matériel uniquement | $1,300 - $6,100 |
Coûts d'installation : Installation par un bricoleur ou par un professionnel
La principale variation de prix est liée à l'équipement et à la main-d'œuvre spécialisée nécessaires pour positionner correctement les lourdes ancres sur le fond marin.
| Catégorie de coût | Installation à domicile (budget) | Installation professionnelle (service complet) |
| Location de matériel | Petite péniche/ponton : $300 - $700 | Chaland-grue / bateau de travail : Inclus |
| Travail et expertise | $0 (Nécessite 3+ travailleurs solides) | Plongeurs commerciaux et équipage : $1,500 - $5,000 |
| Vérification technique | Sondage manuel / visuel | Sonar et vidéo sous-marine : Inclus |
| Permis et taxes | Manipulé par le propriétaire : $100 - $500 | Manipulés par l'entrepreneur : $100 - $500 |
| COÛT TOTAL DE LA MAIN-D'ŒUVRE | $400 - $1,200 | $1 600 - $5 500+ |
Conseils sur le retour sur investissement : Pourquoi une installation professionnelle permet de réduire les coûts
Bien que les dépenses initiales liées à l'emploi d'une équipe soient plus importantes, l'installation professionnelle peut s'avérer plus économique pour l'utilisation à long terme du quai, en particulier dans des conditions difficiles.
- Précision et cohérence : Les installations réalisées par des bricoleurs sont sujettes au problème de la dérive des ancres, qui sont déposées hors de leur position à cause des courants d'eau. Une barge-grue professionnelle garantit que le placement est précis et que la tension n'est pas inégale, ce qui pourrait déformer les cadres du quai ou faire craquer les supports dans la tempête.
- Contrôle des fonds marins : Les plongeurs professionnels vérifient que les ancres ne reposent pas sur des corniches instables ou qu'elles ne sont pas enfouies trop profondément dans le "sable sucré" ou la vase. Une ancre renversée peut entraîner plus de 10 000 dollars de réparations d'urgence sur le quai.
- Sécurité en eaux profondes : Il est dangereux de travailler avec des blocs de 1 000 livres et de lourdes chaînes en acier sans treuil hydraulique. Les équipes professionnelles réduisent également le risque de dommages matériels et corporels, ce qui est un facteur essentiel en matière de responsabilité civile.
- Durabilité à long terme : Un système réglé par des professionnels minimise les frottements sur les manilles et les chaînes. Cette stratégie de réglage et d'oubli permet normalement d'augmenter le cycle de maintenance de tous les 2 ans à tous les 5-10 ans.
Dans le cas d'un petit quai en eaux calmes et peu profondes, le bricolage est une solution rentable. Toutefois, dans le cas d'eaux profondes, de zones très fréquentées ou exposées à des tempêtes, une équipe professionnelle offre un certain degré de sécurité qui s'autofinance en termes d'entretien et de protection des actifs.
Conclusion
L'ancrage d'un quai flottant est un investissement dans votre future propriété riveraine. Avec la méthodologie appropriée, qu'il s'agisse de la forte stabilité des pieux ou de la conception adaptable de la chaîne croisée, et l'utilisation de matériaux de qualité supérieure tels que ceux proposés par Hisea Dock, vous transformez une simple plate-forme en une structure maritime permanente.
La clé du succès dans cette entreprise réside dans la convergence d'une ingénierie PEHD de haute qualité et d'habitudes d'installation rigoureuses. Lorsque vous achetez un système résistant aux UV et aux chocs et assorti d'une garantie de 5 ans, vous n'achetez pas un quai, vous achetez la tranquillité d'esprit.
FAQS
Q : Que faire pour stabiliser un quai flottant ?
A : Un quai flottant est ancré par une combinaison de pieux verticaux, de chaînes d'ancrage lourdes ou de systèmes de bras rigides pour limiter le mouvement latéral mais permettre au quai de s'élever et de s'abaisser avec le niveau de l'eau. Le balancement et le basculement sont également fortement minimisés en augmentant la surface par l'assemblage de plusieurs modules et en maintenant une tension adéquate dans les lignes d'ancrage.
Q : Quel est le poids nécessaire pour ancrer un quai flottant ?
A : Les quais résidentiels standard ont un poids requis compris entre 500 et 1 000 livres (225 et 450 kg) par point d'ancrage. Le poids exact est déterminé par la superficie du quai, la vitesse maximale du vent local et le courant de l'eau. En règle générale, le poids doit être suffisant pour correspondre à la force latérale maximale calculée causée par les facteurs environnementaux, soit 1,5 à 2 fois.
Q : Qu'est-ce que la règle de l'ancre 7:1 ?
A : La portée de l'ancre est le rapport entre la longueur de la ligne d'ancrage (câble) et la distance verticale entre le fond et la proue du bateau, et est désignée par la règle 7:1. Pour chaque pied de profondeur d'eau (et la distance entre l'eau et le pont), vous devez libérer 7 pieds de ligne, de sorte que l'ancre soit tirée horizontalement et qu'elle s'enfonce dans le fond marin.
Q : De quel côté du bateau ne jettez-vous jamais l'ancre ?
A : Il ne faut jamais ramer à l'arrière d'un bateau. L'ancrage à l'arrière est risqué car l'arrière du bateau est normalement plus lourd avec le moteur et le tableau arrière plus bas, lorsque les vagues ou le courant frappent l'arrière, il est facile de submerger le bateau et le bateau chavire ou coule très rapidement.