Prefacio
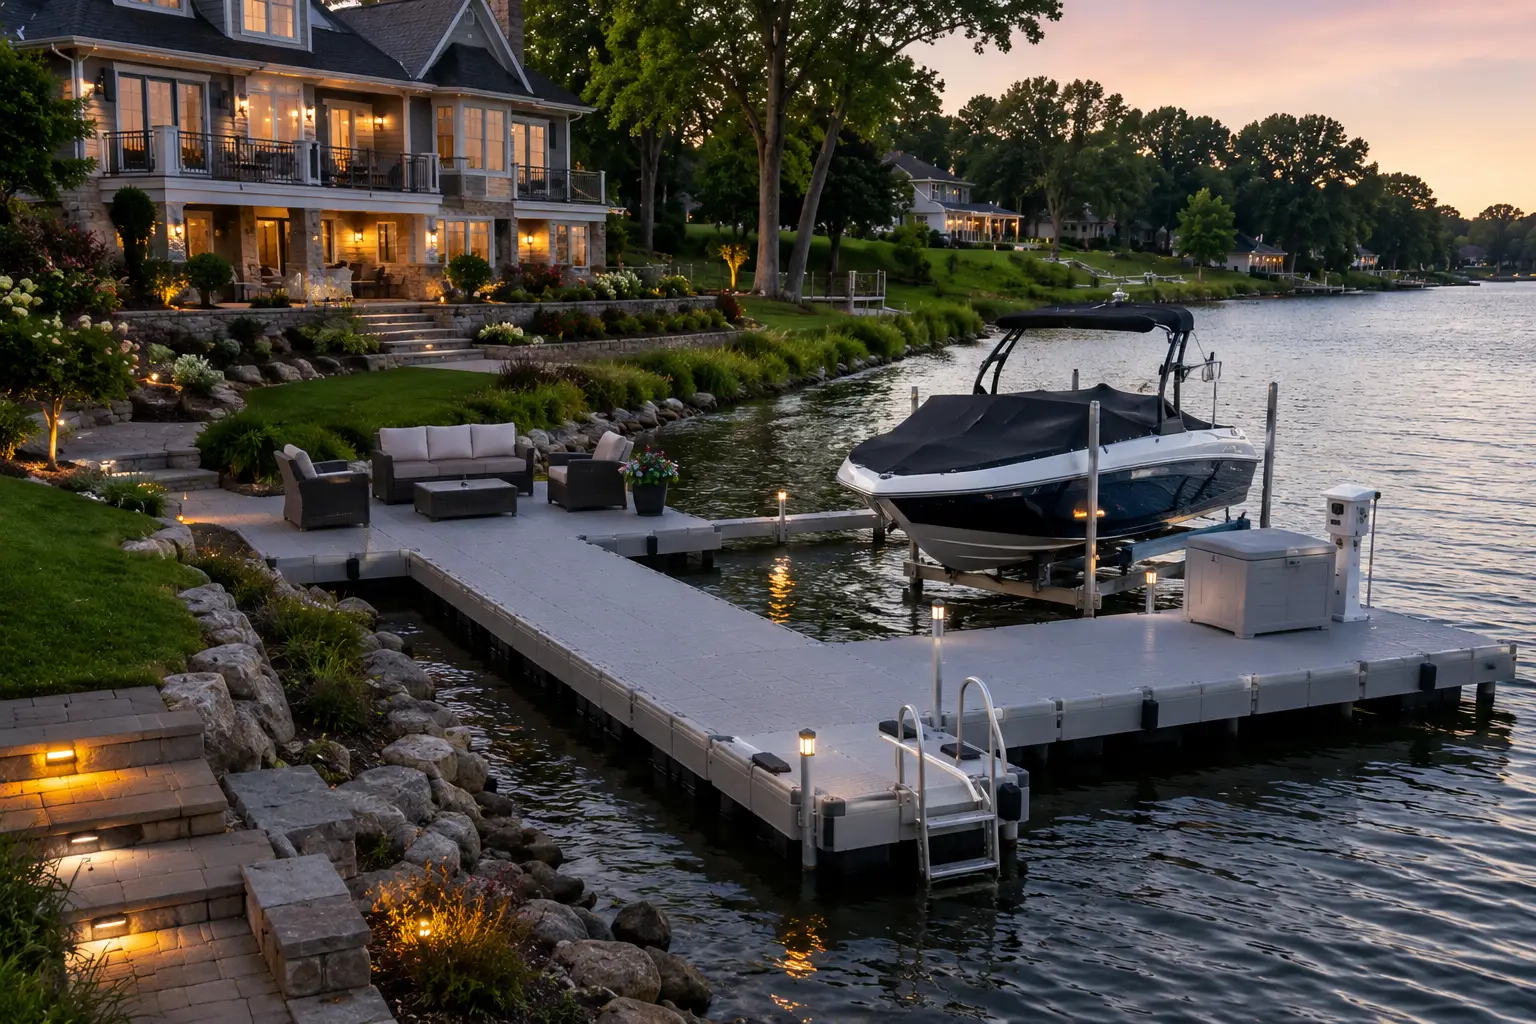
El encanto de los muelles suele caracterizarse por su tranquilidad, pero como saben todos los que han tratado alguna vez con una propiedad frente al mar, el agua nunca está en calma. Un dique flotante es una gran inversión: una puerta al ocio, una plataforma para el comercio y un puente entre el mundo terrestre y el acuático. Pero su utilidad depende de su estabilidad. Un dique que no está bien anclado no es sólo una molestia, sino una responsabilidad que puede causar el colapso estructural, daños a la propiedad e incluso accidentes.
El anclaje de un dique flotante es un ejercicio de ingeniería estructural y evaluación medioambiental. Exige un compromiso entre las estrictas exigencias de la construcción en tierra y la naturaleza fluida e impredecible del agua. Para que un dique sea un recurso estable durante décadas, es necesario comprender las fuerzas que intervienen, como el viento, la corriente, la flotabilidad y la fricción, y hacerles frente utilizando los materiales y técnicas adecuados. Un dique flotante es como un barco sin tripulación, y a menos que se ancle con cuidado y previsión, está a merced de los elementos.
¿Qué es un dique flotante?
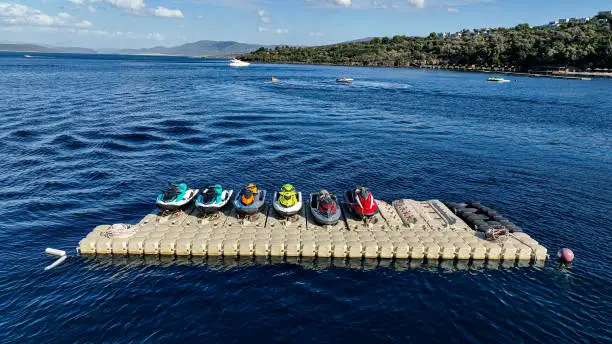
Un dique flotante es una plataforma portátil y flexible que descansa sobre el agua y cuya altura varía con el nivel de ésta. A diferencia de los muelles fijos, que se construyen para ser instalados en la orilla o en el fondo del mar, los muelles flotantes se construyen para ser móviles con las corrientes de agua y se utilizan con una pasarela o rampa con pasamanos para mayor estabilidad y una bisagra de conexión para la rampa. Estos muelles también están fabricados para ser resistentes al óxido y la corrosión, lo que significa que son una solución duradera para el acceso al muelle.
Los diques flotantes suelen estar fabricados con materiales ligeros y robustos, como aluminio, plástico o madera, y flotan sobre materiales flotantes, como espuma o bidones llenos de aire. Pueden diseñarse con diferentes formas y dimensiones en función del tipo de embarcaciones y actividades acuáticas que se vayan a realizar en el muelle. Para evitar que el dique flotante se aleje de la orilla, es necesario fijarlo correctamente con la ayuda de un sistema de anclaje eficaz, como el kit de dique flotante que incluye tablas, eslabones rápidos y cáncamos.
Ventajas de un anclaje adecuado del muelle
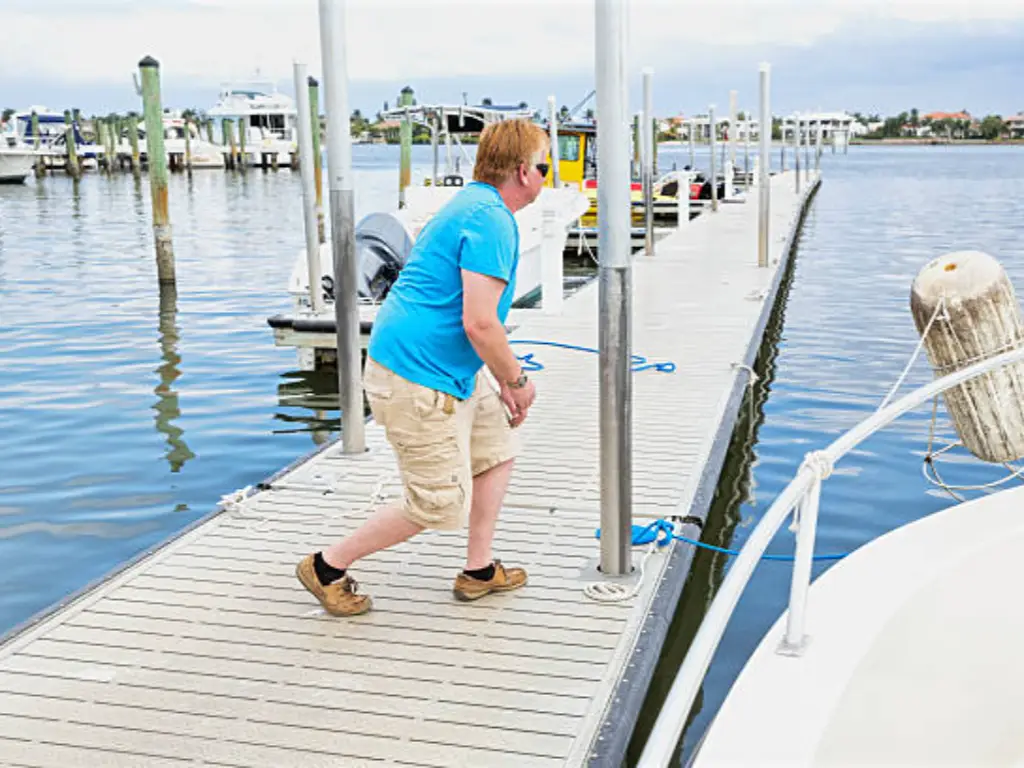
El anclaje adecuado de un dique flotante tiene numerosas ventajas para garantizar su estabilización. La primera ventaja de tener un dique bien anclado es que se vuelve más estable. Esto significa que cuando el muelle se fija en el fondo de la masa de agua, no puede ser fácilmente movido o sacudido por el viento, las olas o los barcos.
Un anclaje adecuado también desempeña un papel crucial a la hora de proteger su dique flotante de cualquier daño que pueda infligirle el clima o las olas. Cuando un muelle está bien fijado mediante un sistema de amarre flotante, se encuentra en una buena posición para contrarrestar las fuerzas de la naturaleza y no sufrir daños ni ser arrastrado fuera de la costa. Además, un muelle bien establecido proporciona a los usuarios una zona segura en la que trabajar, reduciendo así al mínimo las posibilidades de que se produzcan accidentes o lesiones al embarcar o desembarcar de las embarcaciones.
¿Cuál es el impacto de las condiciones meteorológicas y los cambios del nivel del agua en el proceso de fondeo?
Las condiciones meteorológicas y los cambios en el nivel del agua influyen mucho en el proceso de anclaje y en la longevidad del dique flotante. Condiciones como vientos fuertes, fuertes corrientes y grandes olas pueden añadir más presión al sistema de anclaje, lo que puede causar daños al dique o incluso desplazarlo. En regiones donde son frecuentes los huracanes o las mareas de tempestad, puede ser necesario sacar el dique del agua o mejorar el sistema de anclaje durante esas épocas para que sirva de apoyo.
La fiabilidad del anclaje también viene determinada por el sustrato subacuático:
- Rock: Estable, pero no penetrante; la única solución posible en este caso son los pesos muertos basados en la gravedad.
- Arena: Los sinfines roscados son los más adecuados para la arena, que ofrece una buena succión y resistencia mecánica.
- Limo/lodo: Ofrece poca resistencia; es probable que los anclajes en estos fondos sueltos se desplacen y necesiten bases más anchas o más peso.
Además, es posible dejar una longitud extra de cadena para permitir que el muelle suba y baje en caso de que cambie el nivel del agua. En las masas de agua más grandes, puede ser necesario aplicar material adicional, como una tensión de cadena suficiente para garantizar que el muelle permanezca anclado.
A la hora de diseñar su muelle, piense en las condiciones meteorológicas y del agua de su región, y qué tipo de anclaje es el más eficaz frente a estas fuerzas y qué tipo de anclaje es el mejor, ya sean agujeros para huracanes o sistemas de anclaje reforzados, y qué longitud de cadena es la adecuada.
Normativa medioambiental para el fondeo de muelles
A la hora de anclar diques flotantes, hay algunas leyes y normas medioambientales que deben cumplirse para minimizar cualquier efecto sobre el medio ambiente. En cuanto a la conservación del hábitat, hay que evitar colocar los anclajes y los pilotes de hinca de manera que interfieran con los hábitats acuáticos y las zonas de cría de peces. Además, el tipo de material utilizado en la construcción de muelles y sistemas de anclaje, como el material de cubierta, también debe ser respetuoso con el medio ambiente para minimizar las posibilidades de que el material tóxico contamine el agua.
En cuanto al cumplimiento de la legislación, en la mayoría de las jurisdicciones se exigen permisos antes de instalar anclas o pilotes en el fondo público. Estas estructuras suelen tener que ser aprobadas por organismos como el Cuerpo de Ingenieros del Ejército (EE UU) o las juntas marítimas locales para asegurarse de que no impiden la navegación ni vulneran los derechos ribereños. Es necesario consultar a las oficinas locales de zonificación desde el principio, ya que las instalaciones ilegales pueden acarrear fuertes multas o incluso su retirada.
Otro factor importante que también debe tenerse en cuenta es la ubicación de muelles y anclajes, que no deben interferir con las vías navegables y pueden ser potencialmente peligrosos para los usuarios. Por último, hay que tener en cuenta el impacto de las estructuras en la costa y evitar situarlas en zonas propensas a la erosión o en entornos sensibles.
El mejor sistema de anclaje: guía de decisión en 2 pasos
La elección de una técnica de anclaje es un compromiso entre las condiciones del agua y el material del muelle. Utilice este razonamiento para conseguir la disposición más segura de su proyecto.
Paso 1: Evalúe su entorno
La lógica mecánica de sus anclajes viene determinada por las condiciones del agua.
- En Condiciones extremas y zonas de mareas: La regla de oro es el anclaje con pilotes. Cuando hay fuertes olas, vientos fuertes o una subida y bajada continua del agua, se pueden clavar pilotes en el lecho, y así se dispone de una vía permanente y vertical sobre la que colocar el muelle. Es el más estable y requiere una instalación profesional.
- Para aguas profundas (>30 pies): Peso muerto y cadena es la norma del sector. En los casos en que el agua es demasiado profunda para permitir pilotes, los pesados bloques de hormigón (pesos muertos) confían en la gravedad y en un patrón de cadenas entrecruzadas para ofrecer estabilidad lateral sin restricciones de profundidad. A diferencia de los sistemas inestables en línea recta, cuando las cadenas se cruzan entre 45 y 60 grados, se crea la tensión geométrica necesaria para fijar la posición del muelle. Lo más importante es dejar entre un 5% y un 10% de holgura para permitir que el sistema se eleve con seguridad con las mareas o marejadas sin romper los herrajes, y se utilizan conexiones multipunto para distribuir las cargas ambientales y evitar la sobrecarga de los componentes modulares.
- Canales estrechos y diques: Soportes de brazo rígido/pared de mar: Son similares a un amarre mecánico. Son ideales para mantener un muelle a una distancia constante en el río o los canales para que no derive hacia la orilla.
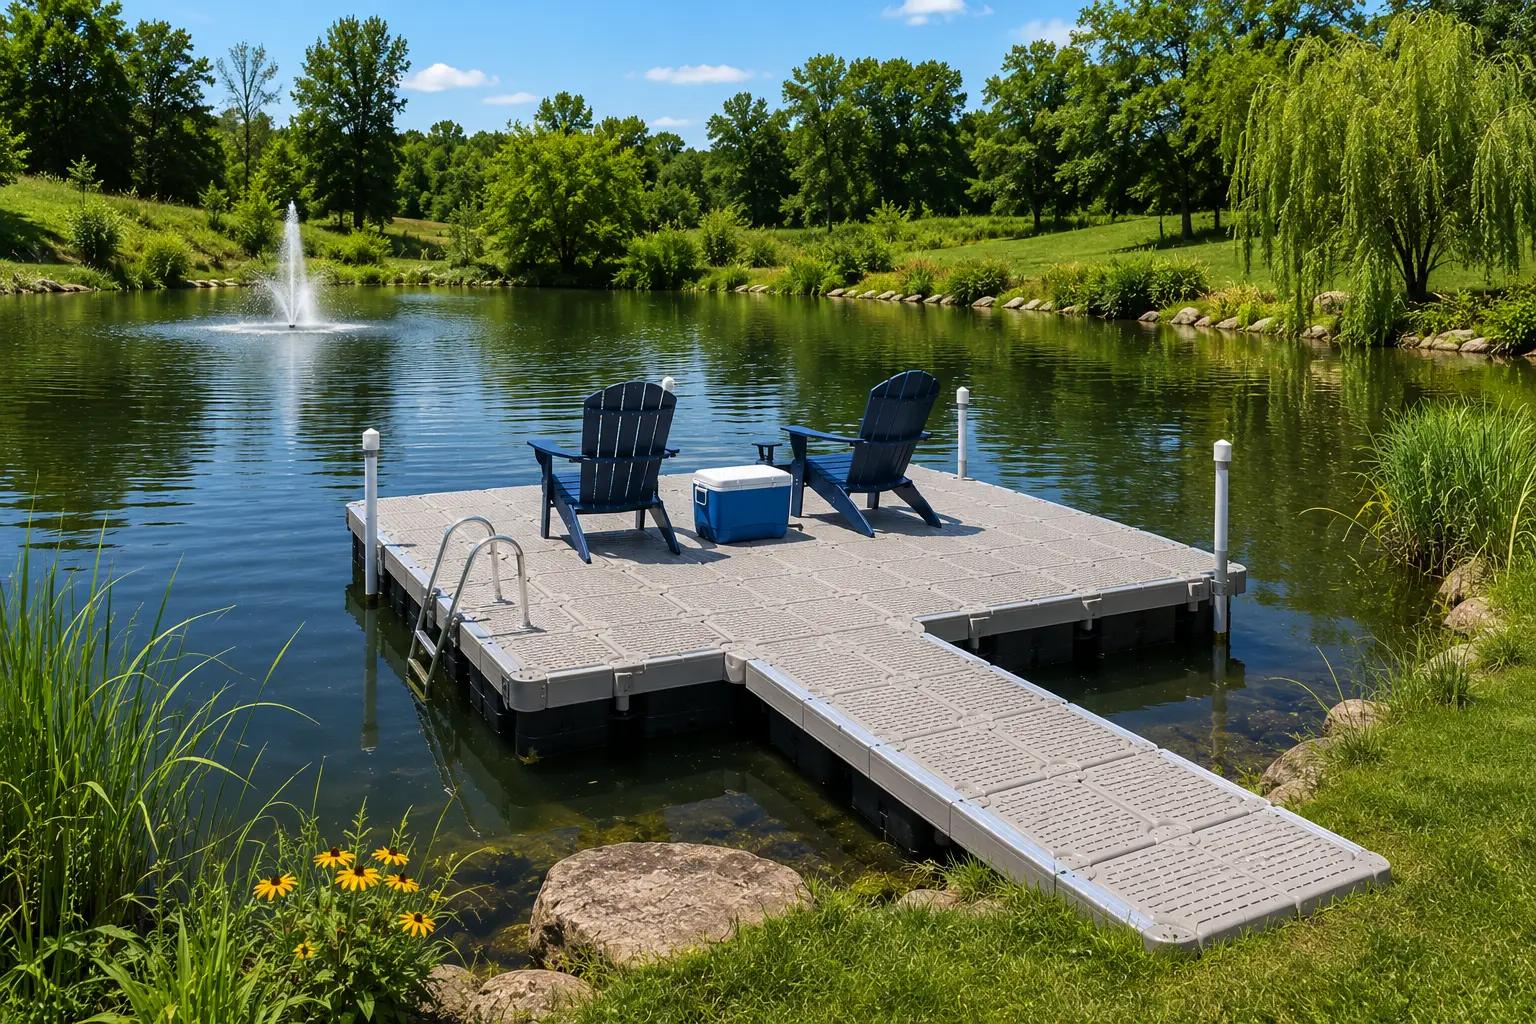
- En el caso de Calm, Shallow Ponds: Los tubos y manguitos son los más adecuados para el bricolaje. Cuando el agua tiene menos de 3 metros y el fondo es blando, los tubos metálicos lisos empujados a través de manguitos son lo suficientemente estables a un bajo coste.
El movimiento del dique viene determinado por la dinámica del agua, pero la geología del fondo determina el agarre final de su sistema. La compatibilidad de la geología de su emplazamiento puede determinarse utilizando la siguiente matriz:
| Tipo de sustrato | Método de anclaje recomendado | Lógica mecánica | Consideraciones clave |
| Roca sólida / Lecho de roca | Peso muerto (basado en la gravedad) | Se basa exclusivamente en la masa y la fricción. | Puede requerir 20%-30% peso adicional para evitar el deslizamiento. |
| Arena / Sedimento firme | Barrenas helicoidales / Anclajes de tierra | Funciona como un tornillo, utilizando tensión mecánica y succión. | Suele requerir buzos profesionales para su instalación en aguas profundas. |
| Limo / Lodo suelto | Pilote profundo o peso muerto de base ancha | Los pilotes deben alcanzar una "capa portante". Los pesos necesitan una huella amplia. | Los anclajes son propensos a "deslizarse" bajo cargas de viento sostenidas. |
| Arcilla | Pilotes o barrenas de alta resistencia | La arcilla proporciona un excelente soporte lateral y un gran agarre para los hilos. | La instalación requiere mucha mano de obra y martinetes pesados. |
| Grava / Adoquín | Cadena pesada y peso muerto | Las superficies irregulares ayudan a que los bloques pesados y las cadenas se "enganchen". | Los sinfines son difíciles de instalar, ya que pueden golpear piedras grandes. |
Paso 2: Encuentre la correspondencia del método con el material de su muelle
El material y la construcción de su muelle determinarán su capacidad para soportar la tensión física del anclaje. Los distintos muelles necesitan distintos grados de apoyo y flexibilidad.
- Muelles flotantes de aluminio
Anclaje: Normalmente se asegura mediante pilotes, brazos rígidos o anclas de peso muerto. Se puede clavar el muelle en el fondo del agua clavando pilotes en el suelo. Un par de brazos rígidos que se extienden desde el muelle hasta la orilla impiden el movimiento lateral del muelle. Los anclajes de peso muerto se basan en la masa de objetos voluminosos (p. ej. Se ancla con la ayuda de bloques de hormigón y otras estructuras para mantener el muelle en su sitio.
- Diques flotantes de madera
A veces se fijan mediante pilotes, cadenas de anclaje o cables. Pueden clavarse en el fondo del agua para que ofrezcan un buen apoyo al muelle. Para evitar la deriva, el muelle se ancla a la orilla o a anclajes pesados en el fondo del agua mediante cadenas o cables.
- Muelles flotantes modulares de plástico
Se suele amarrar con pilotes, cadena o anclas de peso muerto. Pueden clavarse en el fondo del agua para que el muelle modular tenga una buena base y estabilidad, y el material utilizado es el plástico. Pueden unir el muelle a la orilla o a anclajes pesados en el fondo del agua. Los anclajes de peso muerto son anclajes que dependen del peso del objeto para evitar que el muelle salga flotando.
- Diques flotantes de hormigón
Suelen amarrarse con pilotes o anclas de peso muerto. Los pilotes de hormigón pueden clavarse en el fondo del agua para garantizar que el muelle tenga una base sólida sobre la que apoyarse. Los anclajes de peso muerto se basan en la masa de bloques de hormigón para mantener el muelle en su posición y evitar que derive.
- Muelles flotantes hinchables
A veces se fija mediante cuerdas, cadenas de anclaje o pequeñas anclas. Para ello se utilizan cuerdas o cadenas de anclaje que ayudarán a fijar el muelle hinchable a unos anclajes situados en la orilla o en el fondo de la masa de agua. Pequeñas anclas Los medios temporales de anclaje incluyen lanzar objetos al agua (como un rezón o anclas en forma de seta).
- Diques flotantes de tubos
Normalmente, se amarra mediante pilotes, cadenas de anclaje o anclas de peso muerto. Los pilotes pueden clavarse en el fondo del agua para sostener el muelle. Pueden ser un enlace directo entre el muelle y la orilla o anclas pesadas en el fondo del agua. Los anclajes de peso muerto emplean pesos en forma de objetos macizos para asegurar el muelle.
La matriz definitiva para tomar decisiones de anclaje
| Método de anclaje | Mejor entorno | Idoneidad de la profundidad | Tipo de instalación | Permisos e impacto ambiental | Resistencia al invierno y al hielo | Frecuencia de mantenimiento | Mejor combinación de materiales | Coste inicial |
| Apilamiento | Vientos fuertes, olas y tráfico intenso de embarcaciones | Hasta 10 metros | Profesional (Requiere martillo pilón) | Alta complejidad; estructura permanente con alteración del lecho marino. | Deficiente; riesgo de "ice jacking" al sacar las pilas del lecho. | Muy bajo | Hormigón, Madera, Aluminio | Alta |
| Peso muerto y cadena | Aguas profundas o fondos rocosos | Sin límites | Moderado (Requiere barco/barcaza) | Moderado/Bajo; se considera temporal/móvil con un impacto mínimo en el lecho. | Excelente; las cadenas se pueden aflojar o quitar para evitar daños por hielo. | Media (revisión anual de la cadena) | HDPE Modular, Madera, Muelles de tuberías | Moderado |
| Brazo rígido / Malecón | Ríos, canales estrechos o costas escarpadas | N/A (en tierra) | Moderado (posible bricolaje) | Bajo; construcción en tierra con un impacto submarino insignificante. | Moderado; se recomienda desconectar durante los periodos de hielo intenso. | Bajo | Aluminio, HDPE Modular | Moderado |
| Tubos y manguitos | Estanques tranquilos y poco profundos o lagos privados | Menos de 3 metros | DIY Friendly | Muy bajo; no permanente, ligero y normalmente sin permisos. | Bien; los tubos se desmontan fácilmente para guardarlos en invierno. | Media (Ajustar al nivel del agua) | HDPE Modular, Aluminio Pequeño | Bajo |
Para elegir el mejor anclaje, primero hay que analizar el entorno. El pilotaje profesional debe utilizarse donde haya máxima estabilidad en zonas de mucho tráfico o mareas. En aguas profundas (más de 30 pies), la mejor norma del sector es el peso muerto y la cadena. En canales estrechos se utiliza un brazo rígido para mantener la distancia exacta entre la orilla. La técnica de tubería y manguito es relativamente barata y puede aplicarse en estanques poco profundos y tranquilos. Por último, el sistema debe adaptarse al material de su muelle para garantizar la mayor vida útil y la menor tensión estructural.
Los materiales necesarios para anclar un muelle flotante son básicos
La longevidad de su dique flotante depende de la selección de materiales resistentes a las fuerzas hidráulicas constantes y a las condiciones corrosivas. La siguiente tabla clasificará los elementos clave, desde los cimientos hasta la junta de seguridad más pequeña, necesarios para construir un sistema de anclaje de calidad profesional para ayudarle a planificar su construcción.
| Categoría | Componente | Material y especificaciones | El mejor caso de uso |
| Materiales metálicos del núcleo | Metales comunes | Galvanizado en caliente (HDG), acero inoxidable 316, aluminio marino | HDG para cadenas pesadas; Acero inoxidable 316 para fijaciones de agua salada; Aluminio para marcos estructurales. |
| Cimientos de anclaje | Pesos muertos | Bloques de hormigón | Anclaje tradicional por gravedad para aguas profundas. |
| Anclajes de tierra | Sinfines metálicos / Tornillos helicoidales | Gran adherencia mecánica en fondos arenosos o fangosos. | |
| Pilas | Tubos de acero o pilotes de madera | Accionamiento vertical para una máxima estabilidad permanente. | |
| Conectores flexibles | Cadena de anclaje | Cadena galvanizada | Utiliza el peso para crear una "tensión catenaria" que actúa como amortiguador natural. |
| Cable metálico | Cable de acero inoxidable | Alta resistencia a la tracción; debe utilizarse con guardacabos para evitar que se deshilache. | |
| Cuerda sintética | Nylon / Polipropileno | Amarre ligero o temporal para plataformas pequeñas. | |
| Tensión y ajuste | Cabrestantes | HDG o acero inoxidable | Se utiliza para la configuración inicial y los ajustes estacionales del nivel de agua. |
| Amortiguadores | Muelles amortiguadores de alta resistencia | Absorbe la energía cinética repentina de las olas para proteger el armazón del muelle. | |
| Tensores | HDG / Acero inoxidable | Proporciona microajustes para eliminar pequeños balanceos o "holguras". | |
| Sistema "Juntas | Grilletes | HDG / Acero inoxidable 316 (tipo perno de seguridad) | El enlace principal entre las anclas, las cadenas y el muelle. |
| Retenedores de cadena | Ranuras de acero HDG | Se monta en el muelle para bloquear y asegurar cadenas a longitudes específicas. | |
| Aparejos | Dedales y clips Crosby | Protege los ojos de los cables de la fricción y asegura los extremos de los cables metálicos. | |
| Rodillos guía de pila | Poliuretano / Acero galvanizado | Imprescindible para que los sistemas de pilotaje permitan un seguimiento vertical suave. |
Un sistema de anclaje eficaz debe tener un equilibrio entre resistencia, flexibilidad y control de la fricción. Mientras que los pesos muertos o pilotes de hormigón sirven de raíz estructural, la cadena galvanizada sirve de pulmón del sistema, y su peso se utiliza para absorber la energía del oleaje. El acero inoxidable 316 debe utilizarse en grilletes y fijaciones en agua salada para evitar las picaduras de cloruro. Por último, las "juntas" como los rodillos guía de pilotes y los guardacabos son esenciales para minimizar la fricción mecánica. En ausencia de estos accesorios de protección, el movimiento del agua acabaría cortando los cables y erosionando los soportes, provocando la rotura del sistema.
¿Cómo anclar un muelle flotante?
La reparación de un dique flotante es un proceso complicado que implica una serie de pasos para garantizar una base sólida.
- Evalúe el emplazamiento: Para empezar, evalúe el lugar donde va a colocar su dique flotante. Algunos de los factores son la profundidad del agua, el tipo de fondo, si es arenoso, fangoso o rocoso y el grado de exposición a vientos y olas. Esta información le ayudará a determinar el sistema de anclaje adecuado para su emplazamiento.
- Seleccione el sistema de anclaje: En este caso, hay que tener en cuenta la evaluación del emplazamiento y seleccionar el sistema de anclaje más adecuado para el caso en cuestión. Seleccione el tipo de ancla y el cabo de anclaje correctos que proporcionen la capacidad de sujeción y la estabilidad necesarias para su dique flotante.
- Reúna herramientas y materiales: Reúna todas las herramientas y materiales necesarios para el anclaje de la estructura. Estos pueden incluir anclas, cabos de anclaje, grilletes, guardacabos, cabrestantes y cualquier otro hardware que pueda ser necesario en función de su tipo de sistema de anclaje.
- Prepare el muelle: Antes de anclarlo, asegúrese de que el dique flotante está bien construido y colocado en la posición correcta donde desea que esté. Comprueba que todas las juntas de las secciones del muelle estén bien sujetas y que el muelle esté bien colocado en el suelo.
- Marque los puntos de anclaje: En función del tamaño y la forma del muelle, deberá determinar dónde desea colocar los anclajes. Estos puntos deben marcarse utilizando boyas o cualquier otra estructura temporal que ayude a anclar la estructura.
- Coloque los anclajes: En este caso, necesitará una embarcación o cualquier otro medio para transportar las anclas a las zonas señaladas. Baje lentamente las anclas hasta el fondo y asegúrese de que están colocadas correctamente y bien incrustadas en el sedimento. En el caso de las anclas de pilotes, hay que clavarlas en el lecho marino o en el fondo del lago con las herramientas adecuadas.
- Instale los anclajes: Una vez fijados los anclajes, asegure los cabos de anclaje a los anclajes mediante grilletes o cualquier otra conexión adecuada. Asegúrese de que las conexiones estén bien hechas y fijadas de forma que no puedan desconectarse o soltarse fácilmente.
- Fije las líneas de anclaje al muelle: Hay que tirar de los cabos de anclaje hasta el muelle flotante y atarlos a los lugares adecuados, como cornamusas o cáncamos. Para evitar el desgaste de los cabos, hay que utilizar guardacabos y asegurarse de que la carga se distribuye uniformemente.
- Asegure el muelle a los anclajes: Libere la tensión de los cabos de anclaje utilizando los cabrestantes u otros dispositivos diseñados para este fin. Deben tensarse hasta un nivel en el que el muelle no se mueva mucho, pero al mismo tiempo no deben tensarse demasiado para que el muelle o los anclajes estén sometidos a mucha tensión.
- Pruebe la estabilidad: Una vez anclado el barco, asegúrese de que los flotadores están bien sujetos ejerciendo presión sobre el muelle flotante. Asegúrese de que el muelle está bien anclado y es estable para que no vibre cuando se utilice.
Profundización técnica: Cálculo del Anchor Scope Ratio
Para garantizar que un dique flotante se mantiene seguro durante las marejadas, es fundamental utilizar la relación de alcance correcta, es decir, la relación matemática entre la longitud de la línea de anclaje y la distancia vertical total que debe cubrir.
La fórmula de la longitud del ancla
Utilice la siguiente fórmula para determinar la longitud mínima necesaria para cada línea de anclaje individual:

- L: Longitud requerida del cabo de anclaje (cadena o cuerda).
- Dmax: La profundidad máxima del agua en marea alta o niveles máximos del embalse.
- Ola H: La altura máxima de ola prevista durante condiciones de tormenta.
- C: El coeficiente de alcance (determinado por el material elegido).
Coeficientes de alcance estándar (C)
El coeficiente varía en función del peso y la elasticidad de los materiales. Los materiales más pesados crean una "curva catenaria" que actúa como amortiguador natural.
| Material de la barra | Proporción recomendada (C) | Lógica funcional |
| Todo Cadena (Galvanizado) | 3:1 | El gran peso mantiene el anclaje en posición horizontal, lo que garantiza su fijación. |
| Híbrido (cadena + cuerda) | 5:1 | Requiere más longitud para garantizar que el ángulo de tracción se mantenga bajo para la sección de cuerda más ligera. |
| Todo cuerda (Nylon/Poliéster) | 7:1 | Necesario para muelles ligeros para compensar la falta de peso en la línea. |
La gestión estratégica del alcance minimiza eficazmente la carga vertical y la fatiga del hardware. Un error frecuente es utilizar una relación demasiado estrecha (por ejemplo, 1:1). Cuando sube el nivel del agua o se produce una gran ola, una línea demasiado tensa obliga al muelle a tirar directamente hacia arriba del ancla, lo que puede romper los grilletes o arrastrar pesados bloques de hormigón fuera de su posición. Manteniendo una proporción de 3:1 o 5:1, la "holgura" de la cadena permite que el muelle se eleve verticalmente con el agua, mientras que la fuerza horizontal sobre el ancla sigue siendo mínima, lo que evita la deriva.
Soluciones prácticas para la gestión del ruido, el hielo y el nivel del agua
Para ofrecer una experiencia más agradable a los propietarios de muelles y garantizar la funcionalidad a largo plazo, es necesario abordar las cuestiones de mantenimiento y medio ambiente. A continuación se ofrece un desglose técnico y claro de las soluciones para el ruido, el hielo, los niveles de agua y la protección ecológica.
Anclaje silencioso: Cómo eliminar el chirrido de la cadena
La fricción de alta frecuencia de metal contra metal provoca el sonido estridente del roce de las cadenas metálicas contra los soportes de acero. Para eliminarlo, coloque casquillos de polietileno (PE) o juntas de goma de alta resistencia en el punto donde la cadena entra en el retén de la cadena del muelle. Estos materiales sirven de amortiguador de vibraciones, lo que proporciona un entorno silencioso en el muelle sin afectar a la seguridad de la conexión.
Protección invernal: Ice Heave
En climas más fríos, el hielo en crecimiento forma el ice heave, que es lo bastante fuerte como para levantar anclajes de hormigón o doblar pilotes de acero. La tensión de la cadena debe aflojarse antes de que el agua se congele para permitir que el muelle se deslice sobre la superficie del hielo y evitar fallos estructurales. En las instalaciones permanentes, se instalan descongeladores o burbujeadores alrededor de los puntos de anclaje para mantener un círculo de agua abierta circulando mediante el bombeo de agua de fondo más caliente, de modo que el hielo no se adhiera a la estructura.
Tensión automática de cambio frecuente del nivel de agua
Las variaciones diarias de las mareas o de los embalses suelen requerir ajustes manuales de la cadena que requieren mucha mano de obra. Una alternativa automatizada es un sistema de polea de contrapeso que mantiene una tensión constante con un peso pesado. Cuando el agua está alta, la polea mantiene tensas las cadenas y cuando está baja, el peso se encarga de la holgura, de modo que el muelle se mantiene firme y en línea sin necesidad de atención diaria.
Anclaje ecológico: Reducción del efecto lecho de lago
Los anclajes macizos convencionales pueden destruir los frágiles lechos de hierbas marinas y los entornos acuáticos. En lugar de grandes bloques de hormigón, deberían utilizarse anclajes helicoidales (barrenas) para reducir el impacto ambiental. Las barrenas ofrecen una enorme capacidad de sujeción y una huella de apenas unos centímetros, lo que provoca una alteración mínima del lecho del lago. Además, se preserva el ecosistema local mediante la colocación estratégica de los anclajes para evitar zonas sensibles en las que no se pueda segar.
Guía de longevidad: Mantenimiento y resolución de problemas
Un sistema de anclaje es un sistema mecánico móvil que necesita un mantenimiento activo para resistir a la intemperie. Para que sea estable a largo plazo, sigue estas pautas:
- La inspección subacuática anual: Una vez al año, realice una inspección completa de los grilletes y de los primeros cinco pies de cadena cerca del lecho del lago. Es aquí donde se produce la corrosión más agresiva por los ambientes con alto contenido en cloruros y la fricción del sedimento. En caso de poca visibilidad, es aconsejable recurrir a un buzo comercial en las instalaciones de aguas profundas.
- Tensión de la cadena: Cuando vea que su muelle empieza a inclinarse o a descentrarse, es un buen indicio de que hay una tensión desigual. Reequilibre la carga con tensores o apriete/afloje los cabos de anclaje a mano. Una alineación correcta elimina la tensión estructural en el armazón del muelle a medida que varía el nivel del agua.
- La regla del 20% de sustitución: Compruebe todos los herrajes, como cadenas, anclajes y conectores, para ver si son estructuralmente delgados. Cuando cualquier eslabón de cadena ha perdido más del 20% de su diámetro original por oxidación o desgaste, ha alcanzado su punto crítico de fallo. Estas piezas deben sustituirse lo antes posible para evitar un fallo desastroso en caso de tormenta.
- Auditorías post-tormenta: Compruebe la tensión y el posicionamiento rápidamente después de un mal tiempo o de fines de semana de mucho tráfico. La detección precoz de un grillete suelto o un ancla ligeramente desplazada puede ahorrar el costoso precio de un reformado de todo el sistema.
Aunque el mantenimiento de los herrajes es un requisito, el robusto muelle Hisea está creado para colaborar con su sistema de anclaje y garantizar la estabilidad a largo plazo.
Cómo anclar un dique flotante para que sea lo más fiable posible: Norma de ingeniería de diques Hisea
El anclaje requiere una plataforma capaz de soportar las fuerzas físicas a las que se ancla. Hisea Dock se dedica desde 2006 a los sistemas modulares de alto rendimiento, pensados para funcionar en sinergia con estos requisitos técnicos. Nuestros módulos están diseñados para absorber la energía de las olas en lugar de reflejarlas, por lo que están fabricados con una nueva generación de HDPE con altos aditivos UV, lo que disminuirá en gran medida la carga dinámica de sus cadenas y anclajes.
Nuestro diseño se basa en la integridad estructural. Hisea Dock tiene orejas de conexión reforzadas de 19 mm de grosor y ha sido sometido a pruebas exhaustivas para resistir una tensión diagonal de 14.389 N. Esto garantiza que sus puntos de anclaje estén seguros incluso cuando se produzca un fuerte oleaje o incluso cuando esté helando en invierno: nuestro diseño especial de flotabilidad permitirá que el muelle flote de forma segura sobre el hielo.
Además de los herrajes, también ofrecemos planes de anclaje a medida e instrucciones de instalación completas para eliminar las conjeturas. Hisea Dock tiene una garantía de 5 años y dura entre 20 y 30 años más que la media del sector, lo que convierte la compleja tarea del anclaje en una solución segura y de bajo mantenimiento para cualquier paseo marítimo.
Comparación de costes: Presupuesto de bricolaje e instalación profesional
Los costes de anclaje le darán una idea clara de cómo planificar su presupuesto y, al mismo tiempo, asegurarse de que su dique flotante sea seguro a largo plazo. El siguiente desglose separa las necesidades de hardware y el coste logístico de la instalación.
Desglose de costes de material
Sea cual sea el método de instalación, es necesario utilizar herrajes marinos de alta calidad. La siguiente tabla es una estimación de la inversión total de una disposición de anclaje típica.
| Artículo | Especificación | Precio unitario (USD) | Cantidad (configuración estándar) | Coste total estimado |
| Anclas | 500 - 1.000 libras Bloques de hormigón | $150 - $500 | 2 - 4 unidades | $300 - $2.000 |
| Cadena de anclaje | 3/8″ o 1/2″ G43 Galvanizado | $7 - $15 / ft | 100 - 200 pies | $700 - $3.000 |
| Cables | Nylon/Poliéster marino | $2 - $5 / ft | 50 - 100 pies | $100 - $500 |
| Kit de hardware | Grilletes, eslabones giratorios, guardacabos | $200 - $600 | 1 juego completo | $200 - $600 |
| SUBTOTAL | Sólo hardware | $1,300 - $6,100 |
Costes de instalación: Bricolaje frente a instalación profesional
La principal variación de precio es el equipo y la mano de obra especializada necesarios para colocar correctamente las pesadas anclas en el lecho marino.
| Categoría de costes | Instalación de bricolaje (presupuesto) | Instalación profesional (servicio completo) |
| Alquiler de equipos | Pequeña barcaza/pontón: $300 - $700 | Grúa Barcaza / Workboat: Incluido |
| Mano de obra y experiencia | $0 (Requiere 3+ trabajadores fuertes) | Buceadores comerciales y tripulación: $1.500 - $5.000 |
| Verificación técnica | Sonda manual / visual | Sonar y vídeo submarino: Incluido |
| Permisos y tasas | Manejado por el propietario: $100 - $500 | Para contratistas: $100 - $500 |
| COSTE LABORAL TOTAL | $400 - $1.200 | $1.600 - $5.500+ |
Consejos sobre el ROI: Por qué una instalación profesional ahorra costes
Aunque el gasto inicial de contratar a un equipo es mayor, la instalación profesional puede resultar más económica en el uso a largo plazo del muelle, sobre todo en condiciones duras.
- Precisión y coherencia: Las instalaciones de bricolaje son propensas al problema de la deriva del ancla, en la que los anclajes se depositan fuera de su posición debido a las corrientes de agua. Una barcaza grúa profesional significa que la colocación es precisa y la tensión no es desigual, lo que puede hacer que los marcos del muelle se deformen o que los soportes se partan en la tormenta.
- Comprobación de los fondos marinos: Los buceadores profesionales comprueban que las anclas no estén sobre salientes inestables o enterradas a demasiada profundidad en la "arena azucarada" o el fango. Un ancla volcada puede causar más de 10.000 dólares en reparaciones de emergencia en el muelle.
- Seguridad en aguas profundas: No es seguro trabajar con bloques de 1.000 libras y pesadas cadenas de acero sin cabrestantes hidráulicos. El riesgo de daños materiales y lesiones también se reduce con equipos profesionales, lo cual es un factor crucial en la responsabilidad de los seguros.
- Durabilidad a largo plazo: Un sistema ajustado profesionalmente minimiza la fricción en grilletes y cadenas. Esta estrategia de "configúralo y olvídate" normalmente aumenta el ciclo de mantenimiento de cada 2 años a cada 5-10 años.
En el caso de un muelle pequeño en aguas poco profundas y tranquilas de un lago, el bricolaje es una alternativa rentable. Sin embargo, en el caso de aguas profundas, zonas muy transitadas o propensas a tormentas, un equipo profesional ofrece un cierto grado de seguridad que se amortiza por sí mismo en términos de mantenimiento y protección de activos.
Conclusión
El anclaje de un dique flotante es una inversión en su futura propiedad frente al mar. Con la metodología adecuada, ya sea la sólida estabilidad de los pilotes o el diseño adaptable de cadenas entrecruzadas, y el uso de materiales superiores como los que ofrece Hisea Dock, convertirá una mera plataforma en una estructura marítima permanente.
La clave del éxito en esta empresa radica en la convergencia de una ingeniería de HDPE de alta calidad y unos hábitos de instalación rigurosos. Cuando se adquiere un sistema resistente a los rayos UV, a los impactos y con una garantía de 5 años, no se está comprando un muelle, sino tranquilidad.
FAQS
P: ¿Qué hacer para estabilizar un dique flotante?
A: Un dique flotante se ancla mediante una mezcla de pilotes verticales, cadenas de anclaje de gran peso o sistemas de brazo rígido para limitar el movimiento lateral pero permitir que el dique suba y baje con el nivel del agua. El balanceo y la inclinación también se minimizan en gran medida aumentando la superficie mediante la unión de varios módulos y manteniendo una tensión adecuada en las líneas de anclaje.
P: ¿Cuál es el peso para anclar un dique flotante?
A: Los muelles residenciales estándar tienen un peso requerido de entre 225 y 450 kg (500 y 1.000 lb) por punto de anclaje. La cantidad exacta viene determinada por los metros cuadrados del muelle, la velocidad máxima del viento local y la corriente del agua; una regla empírica es tener suficiente peso para igualar la fuerza lateral máxima calculada causada por los factores ambientales, que es de 1,5 a 2 veces.
P: ¿Qué es la regla del ancla 7:1?
A: El alcance del ancla es la relación entre la longitud del cabo del ancla (cabo) y la distancia vertical entre el fondo y la proa de la embarcación, y se denomina regla 7:1. Por cada 1 pie de profundidad del agua (y la distancia entre el agua y la cubierta) hay que soltar 7 pies de cabo, de modo que el ancla quede en posición horizontal y corte el fondo marino.
P: ¿En qué lado del barco no fondea nunca?
A: Nunca debes remar un barco por la popa (la parte trasera). El fondeo por popa es arriesgado, ya que la parte trasera de la embarcación suele ser más pesada con el motor y el espejo de popa más bajo; cuando las olas o la corriente golpean la popa, es fácil que el barco se hunda o vuelque muy rápidamente.