Prefacio
The charm of the waterfront is usually characterized by its calmness, but as every person who has ever dealt with a waterfront property is aware, water is never calm. A floating dock is a big investment- a gateway to recreation, a platform to trade and a bridge between the land and the water world. But its usefulness is all a matter of its stability. A dock that is not properly anchored is not just a nuisance, but a liability that may cause structural collapse, damage to property and even accidents.
Floating dock anchoring is a structural engineering and environmental evaluation exercise. It demands a compromise between the strict demands of the land-based construction and the flowing, unpredictable nature of the water. In order to make a dock a stable resource over decades, it is necessary to comprehend the forces involved, including wind, current, buoyancy, and friction, and deal with them using the right materials and techniques. A floating dock is like a ship without a crew, and unless it is anchored with care and forethought, it is at the mercy of the elements.
¿Qué es un dique flotante?
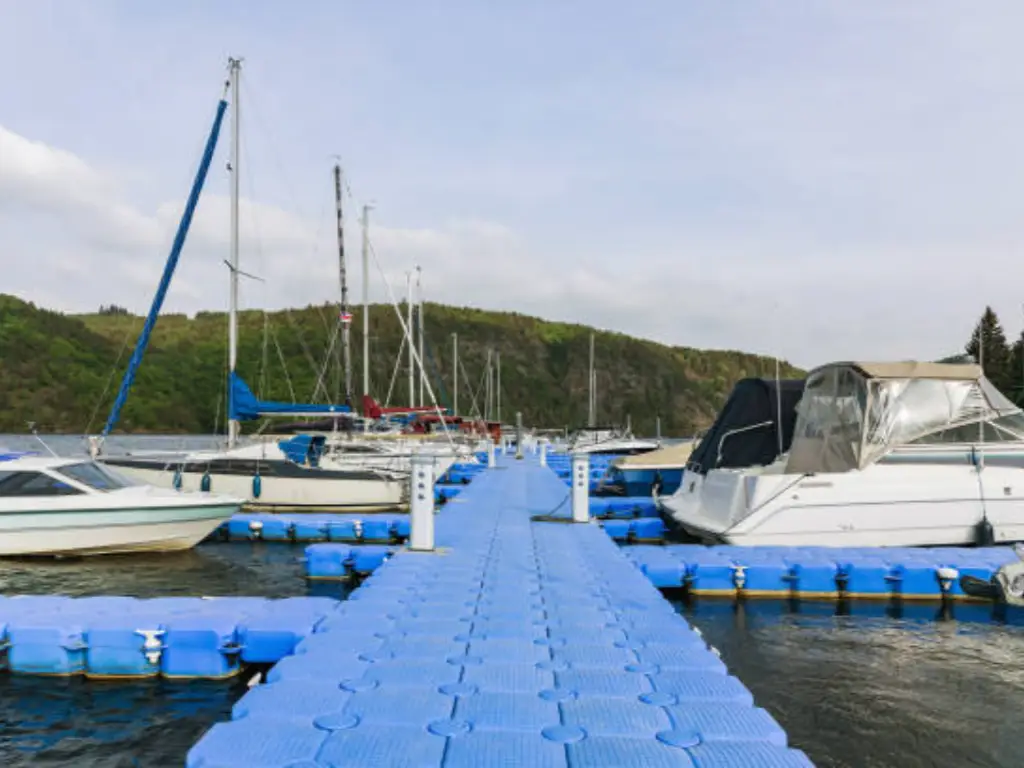
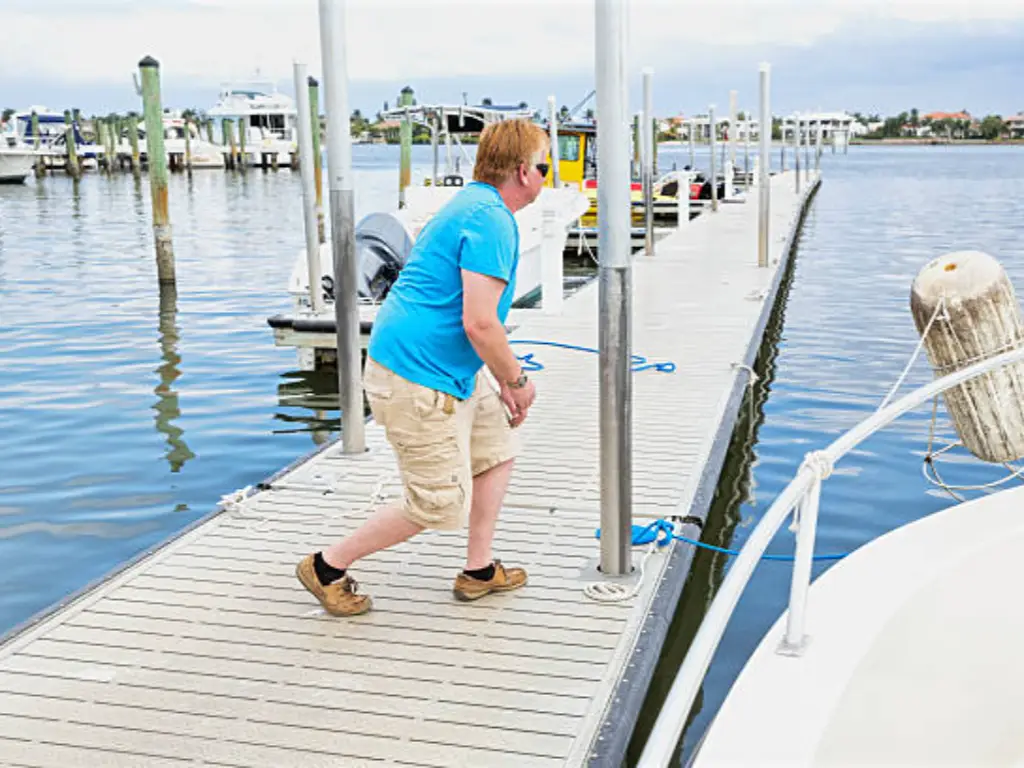
Un dique flotante es una plataforma portátil y flexible que descansa sobre el agua y cuya altura varía con el nivel de ésta. A diferencia de los muelles fijos, que se construyen para ser instalados en la orilla o en el fondo del mar, los muelles flotantes se construyen para ser móviles con las corrientes de agua y se utilizan con una pasarela o rampa con pasamanos para mayor estabilidad y una bisagra de conexión para la rampa. Estos muelles también están fabricados para ser resistentes al óxido y la corrosión, lo que significa que son una solución duradera para el acceso al muelle.
Los diques flotantes suelen estar fabricados con materiales ligeros y robustos, como aluminio, plástico o madera, y flotan sobre materiales flotantes, como espuma o bidones llenos de aire. Pueden diseñarse con diferentes formas y dimensiones en función del tipo de embarcaciones y actividades acuáticas que se vayan a realizar en el muelle. Para evitar que el dique flotante se aleje de la orilla, es necesario fijarlo correctamente con la ayuda de un sistema de anclaje eficaz, como el kit de dique flotante que incluye tablas, eslabones rápidos y cáncamos.
Ventajas de un anclaje adecuado del muelle
El anclaje adecuado de un dique flotante tiene numerosas ventajas para garantizar su estabilización. La primera ventaja de tener un dique bien anclado es que se vuelve más estable. Esto significa que cuando el muelle se fija en el fondo de la masa de agua, no puede ser fácilmente movido o sacudido por el viento, las olas o los barcos.
Un anclaje adecuado también desempeña un papel crucial a la hora de proteger su dique flotante de cualquier daño que pueda infligirle el clima o las olas. Cuando un muelle está bien fijado mediante un sistema de amarre flotante, se encuentra en una buena posición para contrarrestar las fuerzas de la naturaleza y no sufrir daños ni ser arrastrado fuera de la costa. Además, un muelle bien establecido proporciona a los usuarios una zona segura en la que trabajar, reduciendo así al mínimo las posibilidades de que se produzcan accidentes o lesiones al embarcar o desembarcar de las embarcaciones.
What is the Impact of Weather and Changing Water Levels on the Anchoring Process?
Las condiciones meteorológicas y los cambios en el nivel del agua influyen mucho en el proceso de anclaje y en la longevidad del dique flotante. Condiciones como vientos fuertes, fuertes corrientes y grandes olas pueden añadir más presión al sistema de anclaje, lo que puede causar daños al dique o incluso desplazarlo. En regiones donde son frecuentes los huracanes o las mareas de tempestad, puede ser necesario sacar el dique del agua o mejorar el sistema de anclaje durante esas épocas para que sirva de apoyo.
Anchor reliability is also determined by the subaqueous substrate:
- Rock: Stable, but not penetrative; the only possible solution in this case is gravity-based deadweights.
- Sand: Screw-in augers are best suited to sand, which offers good suction and mechanical resistance.
- Silt/Muck: Offers low resistance; anchors in these loose bottoms are likely to creep and need broader bases or more weight.
Also, it is possible to leave extra chain length to allow the dock to rise and fall in case the water level changes. In the larger bodies of water, there may be a need to apply extra material like sufficient chain tension to ensure the dock remains anchored.
A la hora de diseñar su muelle, piense en las condiciones meteorológicas y del agua de su región, y qué tipo de anclaje es el más eficaz frente a estas fuerzas y qué tipo de anclaje es el mejor, ya sean agujeros para huracanes o sistemas de anclaje reforzados, y qué longitud de cadena es la adecuada.
Normativa medioambiental para el fondeo de muelles
A la hora de anclar diques flotantes, hay algunas leyes y normas medioambientales que deben cumplirse para minimizar cualquier efecto sobre el medio ambiente. En cuanto a la conservación del hábitat, hay que evitar colocar los anclajes y los pilotes de hinca de manera que interfieran con los hábitats acuáticos y las zonas de cría de peces. Además, el tipo de material utilizado en la construcción de muelles y sistemas de anclaje, como el material de cubierta, también debe ser respetuoso con el medio ambiente para minimizar las posibilidades de que el material tóxico contamine el agua.
In terms of legal compliance, in most jurisdictions, permits are required prior to the installation of anchors or piles on the public bottom land. These structures frequently have to be approved by agencies such as the Army Corps of Engineers (U.S.) or local maritime boards to make sure that they do not impede navigation or infringe on riparian rights. Consultation with local zoning offices is necessary at an early stage since illegal installations may lead to hefty fines or even removal.
Otro factor importante que también debe tenerse en cuenta es la ubicación de muelles y anclajes, que no deben interferir con las vías navegables y pueden ser potencialmente peligrosos para los usuarios. Por último, hay que tener en cuenta el impacto de las estructuras en la costa y evitar situarlas en zonas propensas a la erosión o en entornos sensibles.
The Best Anchoring System: 2-Step Decision Guide
The choice of an anchoring technique is a compromise between your water conditions and your dock material. Use this reasoning to get the safest arrangement of your project.
Step 1: Assess Your Environment
The mechanical logic of your anchors is determined by your water conditions.
- In Extreme Conditions and Tidal Zones: The gold standard is Piling Anchoring. When you have heavy wakes, high winds, or a continual rise and fall of water, you may have piles driven into the bed, and then you have a permanent, vertical track on which to run your dock. It is the most stable and it needs professional installation.
- For Deep Water (>30 ft): Deadweight & Chain is the industry standard. In cases where the water is too deep to allow piles, heavy concrete blocks (deadweights) rely on gravity and a crisscross chain pattern to offer lateral stability with no depth restrictions. In contrast to unstable straight-line systems, when the chains are crossed at 45 degrees to 60 degrees, the geometric tension is created to fix the position of the dock. The most important thing is to leave 5 percent to 10 percent of slack to allow the system to rise safely with the tides or surges without breaking hardware, and multi-point connections are used to distribute environmental loads to avoid overloading modular components.
- Narrow Channels and Seawalls: Stiff Arm/Seawall Mounts: These are similar to a mechanical tether. They are ideal in maintaining a dock at a constant distance in the river or canals so that it does not drift towards the bank.
- In the case of Calm, Shallow Ponds: Pipe and Sleeve is the most DIY-friendly. When the water is less than 10 feet and the bottom is soft, plain metal pipes pushed through sleeves are stable enough at a low cost.
The movement of the dock is determined by the water dynamics, but the bottom geology determines the final grip of your system. The compatibility of the geology of your site can be determined using the following matrix:
| Substrate Type | Recommended Anchoring Method | Mechanical Logic | Consideraciones clave |
| Solid Rock / Bedrock | Deadweight (Gravity-based) | Relies purely on mass and friction. | May require 20%–30% additional weight to prevent sliding. |
| Sand / Firm Sediment | Helical Augers / Earth Anchors | Functions like a screw, utilizing mechanical tension and suction. | Often requires professional divers for deep-water installation. |
| Silt / Loose Muck | Deep Piling or Wide-Base Deadweight | Piles must reach a “bearing layer.” Weights need a wide footprint. | Anchors are prone to “creeping” under sustained wind loads. |
| Clay | Piles or Heavy Duty Augers | Clay provides excellent lateral support and high grip for threads. | Installation is labor-intensive; requires heavy-duty pile drivers. |
| Gravel / Cobble | Heavy Chain & Deadweight | Irregular surfaces help heavy blocks and chains to “catch.” | Augers are difficult to install as they may hit large stones. |
Step 2: Find the Match of the Method to Your Dock Material
Your dock is made of material and construction that will determine its ability to withstand the physical stress of anchoring. Various docks need varying degrees of support and flexibility.
- Muelles flotantes de aluminio
Anclaje: Normalmente se asegura mediante pilotes, brazos rígidos o anclas de peso muerto. Se puede clavar el muelle en el fondo del agua clavando pilotes en el suelo. Un par de brazos rígidos que se extienden desde el muelle hasta la orilla impiden el movimiento lateral del muelle. Los anclajes de peso muerto se basan en la masa de objetos voluminosos (p. ej. Se ancla con la ayuda de bloques de hormigón y otras estructuras para mantener el muelle en su sitio.
- Diques flotantes de madera
A veces se fijan mediante pilotes, cadenas de anclaje o cables. Pueden clavarse en el fondo del agua para que ofrezcan un buen apoyo al muelle. Para evitar la deriva, el muelle se ancla a la orilla o a anclajes pesados en el fondo del agua mediante cadenas o cables.
- Muelles flotantes modulares de plástico
Se suele amarrar con pilotes, cadena o anclas de peso muerto. Pueden clavarse en el fondo del agua para que el muelle modular tenga una buena base y estabilidad, y el material utilizado es el plástico. Pueden unir el muelle a la orilla o a anclajes pesados en el fondo del agua. Los anclajes de peso muerto son anclajes que dependen del peso del objeto para evitar que el muelle salga flotando.
- Diques flotantes de hormigón
Suelen amarrarse con pilotes o anclas de peso muerto. Los pilotes de hormigón pueden clavarse en el fondo del agua para garantizar que el muelle tenga una base sólida sobre la que apoyarse. Los anclajes de peso muerto se basan en la masa de bloques de hormigón para mantener el muelle en su posición y evitar que derive.
- Muelles flotantes hinchables
A veces se fija mediante cuerdas, cadenas de anclaje o pequeñas anclas. Para ello se utilizan cuerdas o cadenas de anclaje que ayudarán a fijar el muelle hinchable a unos anclajes situados en la orilla o en el fondo de la masa de agua. Pequeñas anclas Los medios temporales de anclaje incluyen lanzar objetos al agua (como un rezón o anclas en forma de seta).
- Diques flotantes de tubos
Normalmente, se amarra mediante pilotes, cadenas de anclaje o anclas de peso muerto. Los pilotes pueden clavarse en el fondo del agua para sostener el muelle. Pueden ser un enlace directo entre el muelle y la orilla o anclas pesadas en el fondo del agua. Los anclajes de peso muerto emplean pesos en forma de objetos macizos para asegurar el muelle.
The Ultimate Anchoring Decision Matrix
| Anchoring Method | Best Environment | Depth Suitability | Installation Type | Permitting & Environmental Impact | Winter / Ice Resilience | Maintenance Frequency | Best Material Match | Coste inicial |
| Apilamiento | High winds, waves, & heavy boat traffic | Up to 30 ft | Professional (Requires pile driver) | High complexity; permanent structure with sea-bed disturbance. | Poor; risk of “ice jacking” pulling piles out of the bed. | Very Low | Concrete, Wood, Aluminum | Alta |
| Deadweight & Chain | Deep water or rocky lakebeds | Unlimited | Moderate (Requires boat/barge) | Moderate/Low; considered temporary/mobile with minimal bed impact. | Excellent; chains can be slackened or removed to avoid ice damage. | Medium (Annual chain check) | HDPE Modular, Wood, Pipe Docks | Moderado |
| Stiff Arm / Seawall | Rivers, narrow channels, or steep shorelines | N/A (Shore-based) | Moderate (DIY possible) | Low; shore-based construction with negligible underwater impact. | Moderate; recommended to disconnect during heavy ice periods. | Bajo | Aluminum, HDPE Modular | Moderado |
| Pipe & Sleeve | Calm, shallow ponds or private lakes | Under 10 ft | DIY Friendly | Very Low; non-permanent, lightweight, and usually permit-free. | Good; pipes are easily removed for winter storage. | Medium (Adjust for water levels) | HDPE Modular, Small Aluminum | Bajo |
In order to choose the best anchoring, you should first analyze your surroundings. Professional piling should be used where there is maximum stability in high-traffic or tidal areas. In deep water (more than 30 feet), the best industry standard is deadweight and chain. A rigid arm is used in narrow channels to maintain accurate distance between the shore. The pipe and sleeve technique is a relatively inexpensive, do-it-yourself approach to shallow, calm ponds. Finally, the system should be matched to your dock material to guarantee the greatest life and the least structural stress.
The Materials Needed to Anchor a Floating Dock are Basic
The longevity of your floating dock depends on the selection of materials that are resistant to constant hydraulic forces and corrosive conditions. The following table will classify the key elements, including the foundation to the smallest safety joint, required to build a professional-grade anchoring system to assist you in planning your build.
| Categoría | Componente | Material & Specification | Best Use Case |
| Core Metal Materials | Base Metals | Hot-Dipped Galvanized (HDG), 316 Stainless Steel, Marine Aluminum | HDG for heavy chains; 316 SS for saltwater fasteners; Aluminum for structural frames. |
| Anchoring Foundations | Deadweights | Concrete Blocks | Traditional gravity-based anchoring for deep water. |
| Earth Anchors | Metal Augers / Helical Screws | High mechanical grip in sandy or muddy lakebeds. | |
| Piles | Steel Pipes or Timber Piles | Driven vertically for maximum permanent stability. | |
| Flexible Connectors | Anchoring Chain | Galvanized Chain | Uses weight to create “catenary tension,” acting as a natural buffer. |
| Wire Rope | Stainless Steel Cable | High tensile strength; must use with Thimbles to prevent fraying. | |
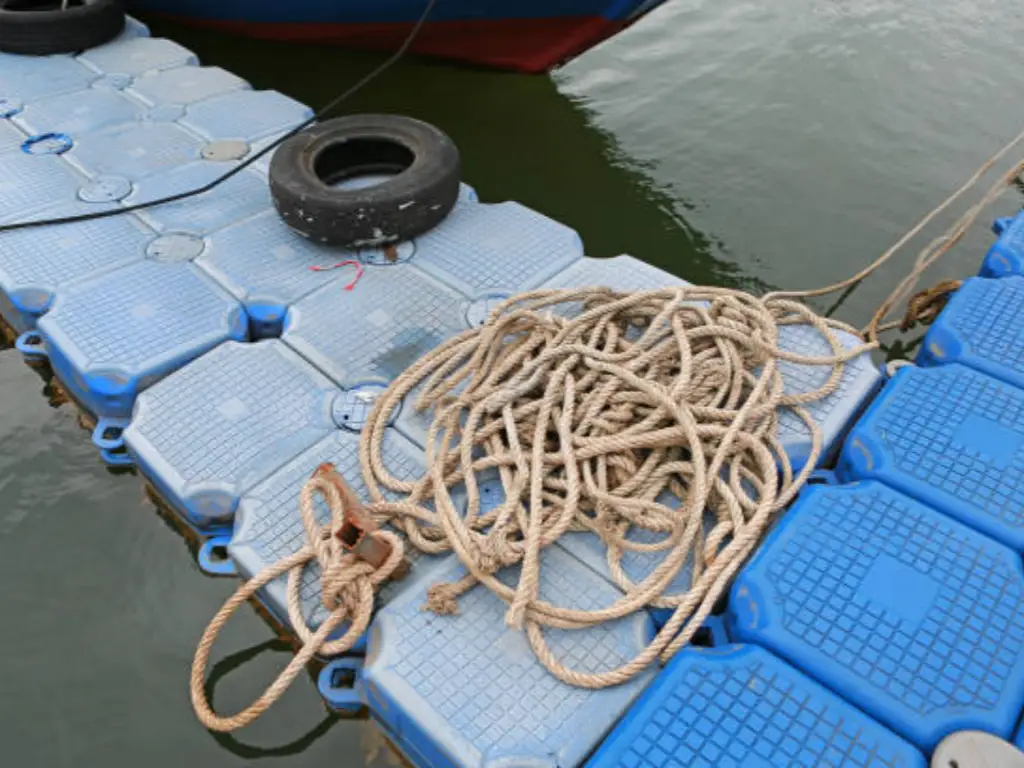
| Synthetic Rope | Nylon / Polypropylene | Lightweight or temporary mooring for small platforms. | |
| Tension & Adjustment | Winches | HDG or Stainless Steel | Used for initial setup and seasonal water level adjustments. |
| Shock Springs | Heavy-Duty Buffer Springs | Absorbs sudden kinetic energy from waves to protect the dock frame. | |
| Turnbuckles | HDG / Stainless Steel | Provides micro-adjustments to eliminate minor swaying or “slack.” | |
| System “Joints” | Shackles | HDG / 316 SS (Safety-Bolt type) | The primary link between anchors, chains, and the dock. |
| Chain Retainers | HDG Steel Slots | Mounted to the dock to lock and secure chains at specific lengths. | |
| Rigging Hardware | Thimbles & Crosby Clips | Protects cable eyes from friction and secures wire rope ends. | |
| Pile Guide Rollers | Polyurethane / Galvanized Steel | Essential for piling systems to allow smooth vertical tracking. |
An effective anchoring system must have a balance of strength, flexibility, and friction control. Whereas Concrete Deadweights or Piles serve as the structural root, the Galvanized Chain serves as the lung of the system, and its weight is used to absorb the wave energy. The 316 Stainless Steel is required to be used in shackles and fasteners in saltwater to avoid chloride pitting. Lastly, the “joints” like Pile Guide Rollers and Thimbles are essential in minimizing mechanical friction. In the absence of these protection accessories, the water movement would ultimately cut through cables and erode brackets causing the system to break down.
¿Cómo anclar un muelle flotante?
The repair of a floating dock is a complicated process that involves a number of steps to ensure a solid base.
- Evalúe el emplazamiento: Para empezar, evalúe el lugar donde va a colocar su dique flotante. Algunos de los factores son la profundidad del agua, el tipo de fondo, si es arenoso, fangoso o rocoso y el grado de exposición a vientos y olas. Esta información le ayudará a determinar el sistema de anclaje adecuado para su emplazamiento.
- Seleccione el sistema de anclaje: En este caso, hay que tener en cuenta la evaluación del emplazamiento y seleccionar el sistema de anclaje más adecuado para el caso en cuestión. Seleccione el tipo de ancla y el cabo de anclaje correctos que proporcionen la capacidad de sujeción y la estabilidad necesarias para su dique flotante.
- Reúna herramientas y materiales: Reúna todas las herramientas y materiales necesarios para el anclaje de la estructura. Estos pueden incluir anclas, cabos de anclaje, grilletes, guardacabos, cabrestantes y cualquier otro hardware que pueda ser necesario en función de su tipo de sistema de anclaje.
- Prepare el muelle: Antes de anclarlo, asegúrese de que el dique flotante está bien construido y colocado en la posición correcta donde desea que esté. Comprueba que todas las juntas de las secciones del muelle estén bien sujetas y que el muelle esté bien colocado en el suelo.
- Marque los puntos de anclaje: En función del tamaño y la forma del muelle, deberá determinar dónde desea colocar los anclajes. Estos puntos deben marcarse utilizando boyas o cualquier otra estructura temporal que ayude a anclar la estructura.
- Coloque los anclajes: En este caso, necesitará una embarcación o cualquier otro medio para transportar las anclas a las zonas señaladas. Baje lentamente las anclas hasta el fondo y asegúrese de que están colocadas correctamente y bien incrustadas en el sedimento. En el caso de las anclas de pilotes, hay que clavarlas en el lecho marino o en el fondo del lago con las herramientas adecuadas.
- Instale los anclajes: Una vez fijados los anclajes, asegure los cabos de anclaje a los anclajes mediante grilletes o cualquier otra conexión adecuada. Asegúrese de que las conexiones estén bien hechas y fijadas de forma que no puedan desconectarse o soltarse fácilmente.
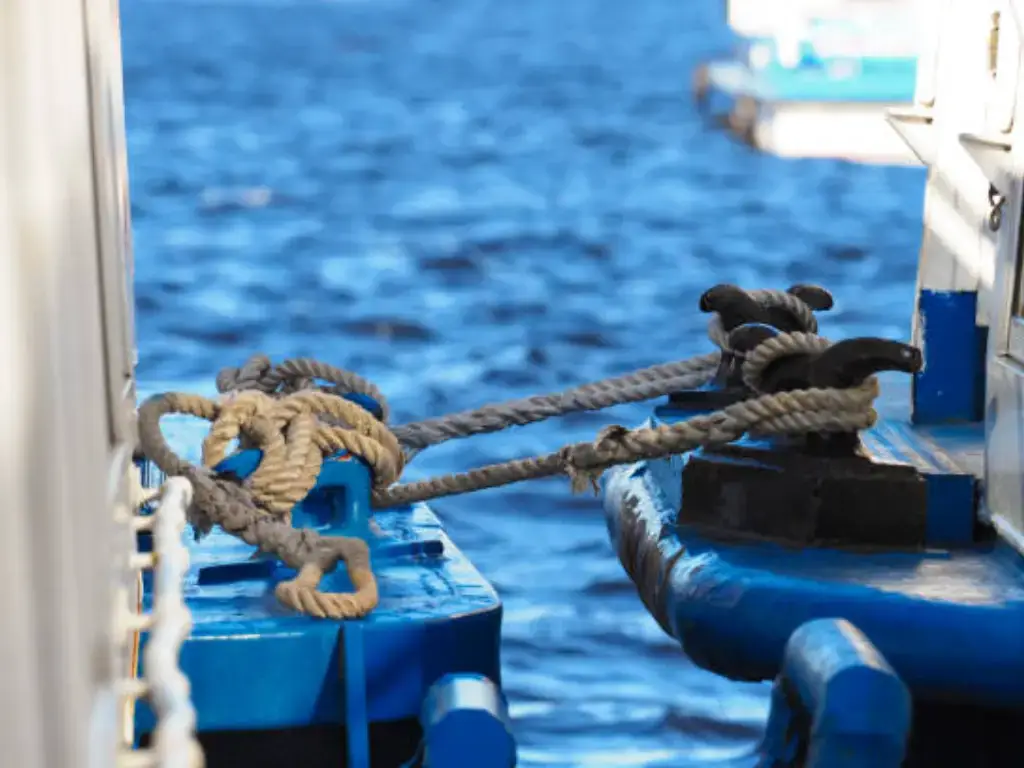
- Fije las líneas de anclaje al muelle: Hay que tirar de los cabos de anclaje hasta el muelle flotante y atarlos a los lugares adecuados, como cornamusas o cáncamos. Para evitar el desgaste de los cabos, hay que utilizar guardacabos y asegurarse de que la carga se distribuye uniformemente.
- Asegure el muelle a los anclajes: Libere la tensión de los cabos de anclaje utilizando los cabrestantes u otros dispositivos diseñados para este fin. Deben tensarse hasta un nivel en el que el muelle no se mueva mucho, pero al mismo tiempo no deben tensarse demasiado para que el muelle o los anclajes estén sometidos a mucha tensión.
- Pruebe la estabilidad: Una vez anclado el barco, asegúrese de que los flotadores están bien sujetos ejerciendo presión sobre el muelle flotante. Asegúrese de que el muelle está bien anclado y es estable para que no vibre cuando se utilice.
Technical Deep Dive: Calculating Anchor Scope Ratio
To ensure a floating dock stays secure during surges, it is critical to use the correct Scope Ratio—the mathematical relationship between the length of your anchor line and the total vertical distance it must cover.
The Anchor Length Formula
Use the following formula to determine the minimum length needed for each individual anchoring line:

- L: Required length of the anchor rode (chain or rope).
- Dmax: The maximum water depth at high tide or peak reservoir levels.
- Hwave: The maximum predicted wave height during storm conditions.
- C: The Scope Coefficient (determined by your material choice).
Standard Scope Coefficients (C)
The coefficient varies based on the weight and elasticity of the materials. Heavier materials create a “catenary curve” that acts as a natural shock absorber.
| Rode Material | Recommended Ratio (C) | Functional Logic |
| All-Chain (Galvanized) | 3:1 | The heavy weight keeps the pull on the anchor horizontal, ensuring it stays bedded. |
| Hybrid (Chain + Rope) | 5:1 | Requires more length to ensure the angle of pull remains low for the lighter rope section. |
| All-Rope (Nylon/Poly) | 7:1 | Necessary for lightweight docks to compensate for the lack of weight in the line. |
Strategic scope management effectively minimizes vertical load and hardware fatigue. A common mistake is using a ratio that is too tight (e.g., 1:1). When water levels rise or a large wave hits, a tight line forces the dock to pull directly upward on the anchor, which can snap shackles or drag heavy concrete blocks out of position. By maintaining a 3:1 or 5:1 ratio, the “slack” in the chain allows the dock to lift vertically with the water while the horizontal force on the anchor remains minimal, preventing drift.
Practical Noise, Ice and Water Level Management Solutions
In order to offer a more enjoyable experience to dock owners and guarantee the long-term functionality, it is necessary to address the maintenance and environmental issues. The following is a technical, clear breakdown of solutions to noise, ice, water levels and ecological protection.
Silent Anchoring: How to Eliminate Chain Squeaking
High-frequency metal-on-metal friction causes the shrill sound of metal chains rubbing against steel brackets. To remove this, place polyethylene (PE) bushings or heavy-duty rubber gaskets at the point where the chain enters the chain retainer of the dock. These materials serve as a vibration-damping buffer, which provides a silent waterfront environment without affecting the security of the connection.
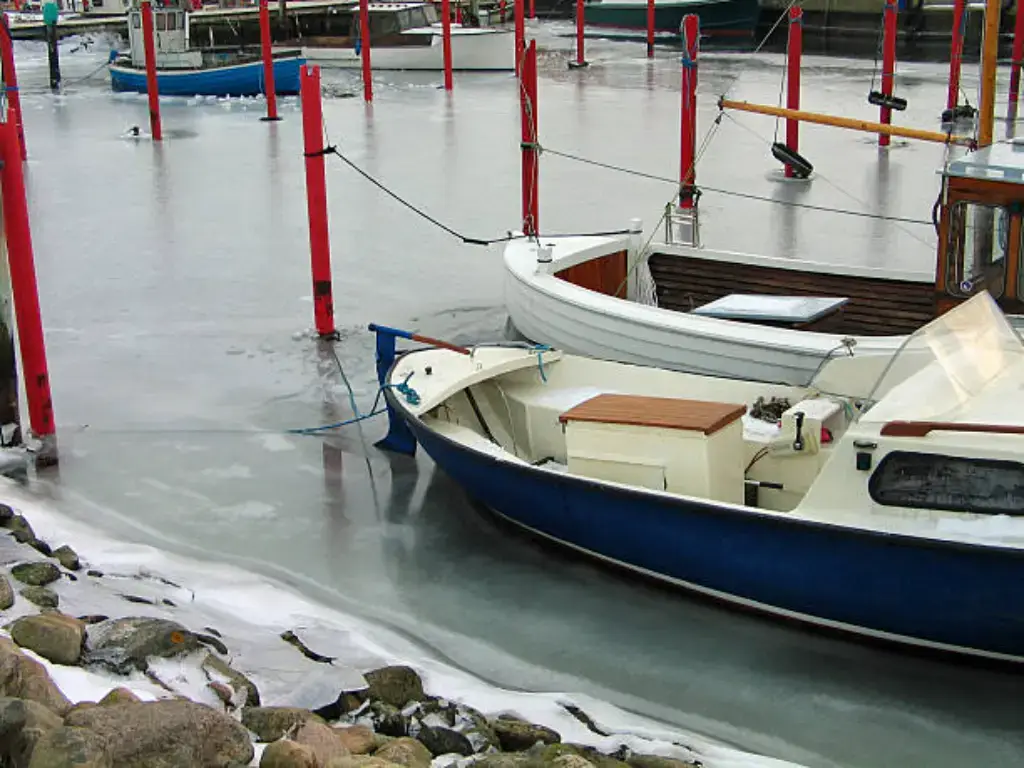
Winter Protection: Ice Heave
In colder climates, the growing ice forms ice heave, which is strong enough to lift concrete anchors or bend steel pilings. The chain tension should be loosened before the water freezes to allow the dock to ride on the ice surface to avoid structural failure. In permanent installations, de-icers or bubblers are installed around anchoring points to keep a circle of open water circulating by pumping warmer bottom water, so that ice does not cling to the structure.
Auto-Tensioning of Frequent Water Level Change
The daily tidal variations or reservoir variations usually necessitate manual chain adjustments which are labor intensive. An automated alternative is a counterweight pulley system that maintains constant tension with a heavy weight. When the water is high the pulley maintains the chains taut and when it is low the weight takes the slack, so that the dock is steady and in line without requiring daily attention.
Green Anchoring: Reducing Lakebed Effect
Conventional massive anchors are able to destroy fragile seagrass beds and aquatic environments. Helical screw anchors (augers) should be used instead of large concrete blocks in order to reduce environmental impact. Augers offer huge holding capacity and a footprint of just a few inches, which causes minimal disturbance to the lakebed. Moreover, the local ecosystem is preserved by strategic positioning of anchor arrays to prevent sensitive no-mow areas.
Longevity Guide: Maintenance and Troubleshooting
An anchoring system is a moving mechanical system that needs active maintenance to resist the elements. To be stable in the long run, follow these guidelines:
- The Annual Underwater Inspection: Once a year, do a comprehensive inspection of the shackles and the first five feet of chain close to the lakebed. It is here that the most aggressive corrosion is produced by high-chloride environments and friction of the sediment. In case of low visibility, a commercial diver is advisable in deep-water installations.
- Chain Tension: When you find your dock starting to lean or to go off center, it is a good indication that there is an uneven tension. Re-balance the load with turnbuckles or tighten/loosen the anchor lines by hand. Correct alignment eliminates structural stress on the dock frame as the water levels vary.
- The 20 Percent Rule of Replacement: Check all hardware, such as chains, anchors, and connectors, to see whether they are structurally thin. When any chain link has lost over 20 percent of its original diameter through rust or wear, it has reached its critical failure point. These parts should be replaced as soon as possible to prevent a disastrous failure in the event of a storm.
- Post-Storm Audits: Check the tension and positioning quickly after heavy weather or high-traffic weekends. Early detection of a loose shackle or a slightly displaced anchor can save the expensive price of an entire system reformat.
Although hardware maintenance is a requirement, a robust Hisea Dock is created to collaborate with your anchoring system to ensure long-term stability.
How to Anchor a Floating Dock to be As Reliable As Possible: Hisea Dock Engineering Standard
The anchoring requires a platform that is capable of sustaining the physical forces that it is anchored to. Hisea Dock has been involved in high-performance modular systems since 2006, which are meant to operate in synergy with these technical requirements. Our modules are designed to absorb the energy of waves instead of reflecting them, which is why they are made of a new generation of HDPE with high UV additives, and this will greatly decrease the dynamic load on your chains and anchors.
Our design is based on structural integrity. Hisea Dock has 19mm-thick reinforced connection ears and has been extensively tested to withstand diagonal tension to 14,389 N. This makes sure that your anchor points are safe even when there is a heavy surge or even when it is freezing in winter- our special buoyancy design will enable the dock to be safely floating on top of the ice.
In addition to the hardware, we also offer tailored anchoring plans and complete installation instructions to remove guesswork. Hisea Dock has a 5-year warranty and lasts 20-30 years longer than the industry average, making the complex task of anchoring a sure, low-maintenance solution to any waterfront.
Cost Comparison: DIY Budget and Professional Installation
Anchoring costs will give you a clear picture of how to plan your budget and at the same time make sure that your floating dock is safe in the long run. The next breakdown separates the hardware needs and the logistical cost of installation.
Material Cost Breakdown
Regardless of the method of installation, high-quality, marine-grade hardware is necessary. The following table is an estimation of the total investment of a typical anchoring arrangement.
| Item | Specification | Unit Price (USD) | Qty (Standard Setup) | Total Estimated Cost |
| Anchors | 500 – 1,000 lbs Concrete Blocks | $150 – $500 | 2 – 4 units | $300 – $2,000 |
| Anchoring Chain | 3/8″ or 1/2″ G43 Galvanized | $7 – $15 / ft | 100 – 200 ft | $700 – $3,000 |
| Rope/Cables | Marine-grade Nylon/Polyester | $2 – $5 / ft | 50 – 100 ft | $100 – $500 |
| Hardware Kit | Shackles, Swivels, Thimbles | $200 – $600 | 1 full set | $200 – $600 |
| SUBTOTAL | Hardware Only | $1,300 – $6,100 |
Installation Costs: DIY vs. Professional Installation
The main price variation is the equipment and specialized labor needed to position heavy anchors on the seabed correctly.
| Cost Category | DIY Installation (Budget) | Professional Installation (Full Service) |
| Equipment Rental | Small barge/pontoon: $300 – $700 | Crane Barge / Workboat: Included |
| Labor & Expertise | $0 (Requires 3+ strong workers) | Commercial Divers & Crew: $1,500 – $5,000 |
| Technical Verification | Manual depth sounding / visual | Sonar & Underwater Video: Included |
| Permits & Fees | Owner-handled: $100 – $500 | Contractor-handled: $100 – $500 |
| TOTAL LABOR COST | $400 – $1,200 | $1,600 – $5,500+ |
ROI Advice: Why Professional Installation is Cost-Saving
Although the initial expense of employing a team is greater, professional installation can be more economical in the long-term use of the dock, particularly in harsh conditions.
- Accuracy and Consistency: DIY installations are prone to the problem of Anchor Drift, where anchors are deposited out of position because of water currents. A professional crane barge means that the placement is accurate and the tension is not uneven, which may cause the dock frames to be warped or the brackets to snap in the storm.
- Checking of the Seabed: Professional divers check that anchors are not lying on unstable ledges or are buried too deep in the “sugar sand” or muck. An overturned anchor may cause more than 10,000 dollars in emergency repairs to the dock.
- Deep Water Safety: It is unsafe to work with 1,000 lb blocks and heavy steel chains without hydraulic winches. The risk of property damage and injury is also reduced by professional teams, which is a crucial factor in insurance liability.
- Long-Term Durability: A professionally adjusted system minimizes friction on shackles and chains. This set it and forget it strategy normally increases the maintenance cycle of every 2 years to every 5-10 years.
In the case of a small dock in shallow calm lake water, DIY is a cost-effective alternative. Nevertheless, in the case of deep water, high-traffic, or high-storm-prone areas, a professional team offers a certain degree of security that is self-paying in terms of maintenance and asset protection.
Conclusión
Floating dock anchoring is an investment in your future waterfront property. With the proper methodology, be it the strong stability of pilings or the adaptable crisscross chain design, and the use of superior materials such as the ones offered by Hisea Dock, you turn a mere platform into a permanent maritime structure.
The key to success in this venture lies in the convergence of high grade HDPE engineering and rigorous installation habits. When you purchase a system that is UV-resistant, impact-resistant and has a 5-year warranty, you are not purchasing a dock, you are purchasing peace of mind.
FAQS
Q: What to do to stabilize a floating dock?
A: A floating dock is anchored by a mixture of vertical piles, heavy weight anchor chains, or stiff arm systems to limit the lateral movement but allow the dock to rise and fall with the water level. Swaying and tilting is also greatly minimized by increasing the surface area by joining several modules and maintaining adequate tension in the anchoring lines.
Q: What is the weight to anchor a floating dock?
A: Standard residential docks have a required weight of between 500 and 1,000 lbs (225 and 450 kg) per anchor point. The precise amount is determined by the square footage of the dock, the maximum local wind speed, and the current of the water; a rule of thumb is to have sufficient weight to match the calculated maximum lateral force caused by the environmental factors, which is 1.5 to 2 times.
Q: What is the 7:1 anchor rule?
A: The anchor scope is the ratio of the length of the anchor line (rode) to the vertical distance between the bottom and the bow of the boat, and is denoted as the 7:1 rule. To every 1 foot of water depth (and the distance between the water and the deck) you must release 7 feet of line, so that the anchor is drawn horizontally, and it will cut into the seabed.
Q: What side of the boat do you never anchor?
A: You must never row a boat at the stern (the back). The stern anchoring is risky since the rear of the boat is normally heavier with the engine and lower transom, when waves or current strike the stern, it is easy to swamp the boat and the boat capsizes or sinks very fast.