The Ultimate Floating Dock Installation Manual (Costs & Matrices)
Navigating the complexities of hydrographic physics, industrial-grade material science, and long-term financial strategy. A definitive technical roadmap by Hiseadock engineering for maximum maritime asset protection.
In the global maritime infrastructure industry, the procurement and deployment of a floating platform is often misunderstood as a simple acquisition of buoyancy. However, for professional marina operators, commercial port developers, and high-end residential estate managers, the reality is far more demanding.
Executive Summary: What This Manual Covers
- Financial Logic (TCO): Why initial CAPEX is misleading and how to calculate a 20-year ROI.
- Material Science: The critical difference between standard plastics and stress-free polymers.
- Hydrographic Compliance: Navigating federal regulations and tidal assessments.
- The 5:1 Mooring Physics: Preventing catastrophic failure during extreme storm cycles.
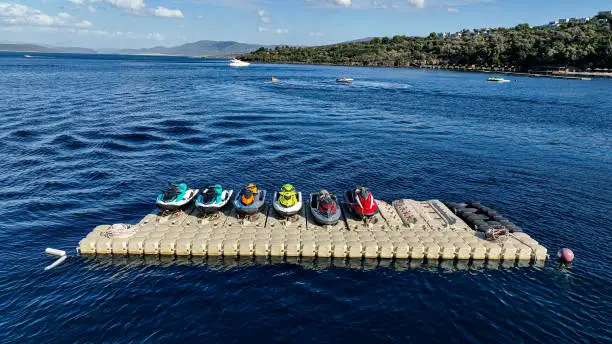
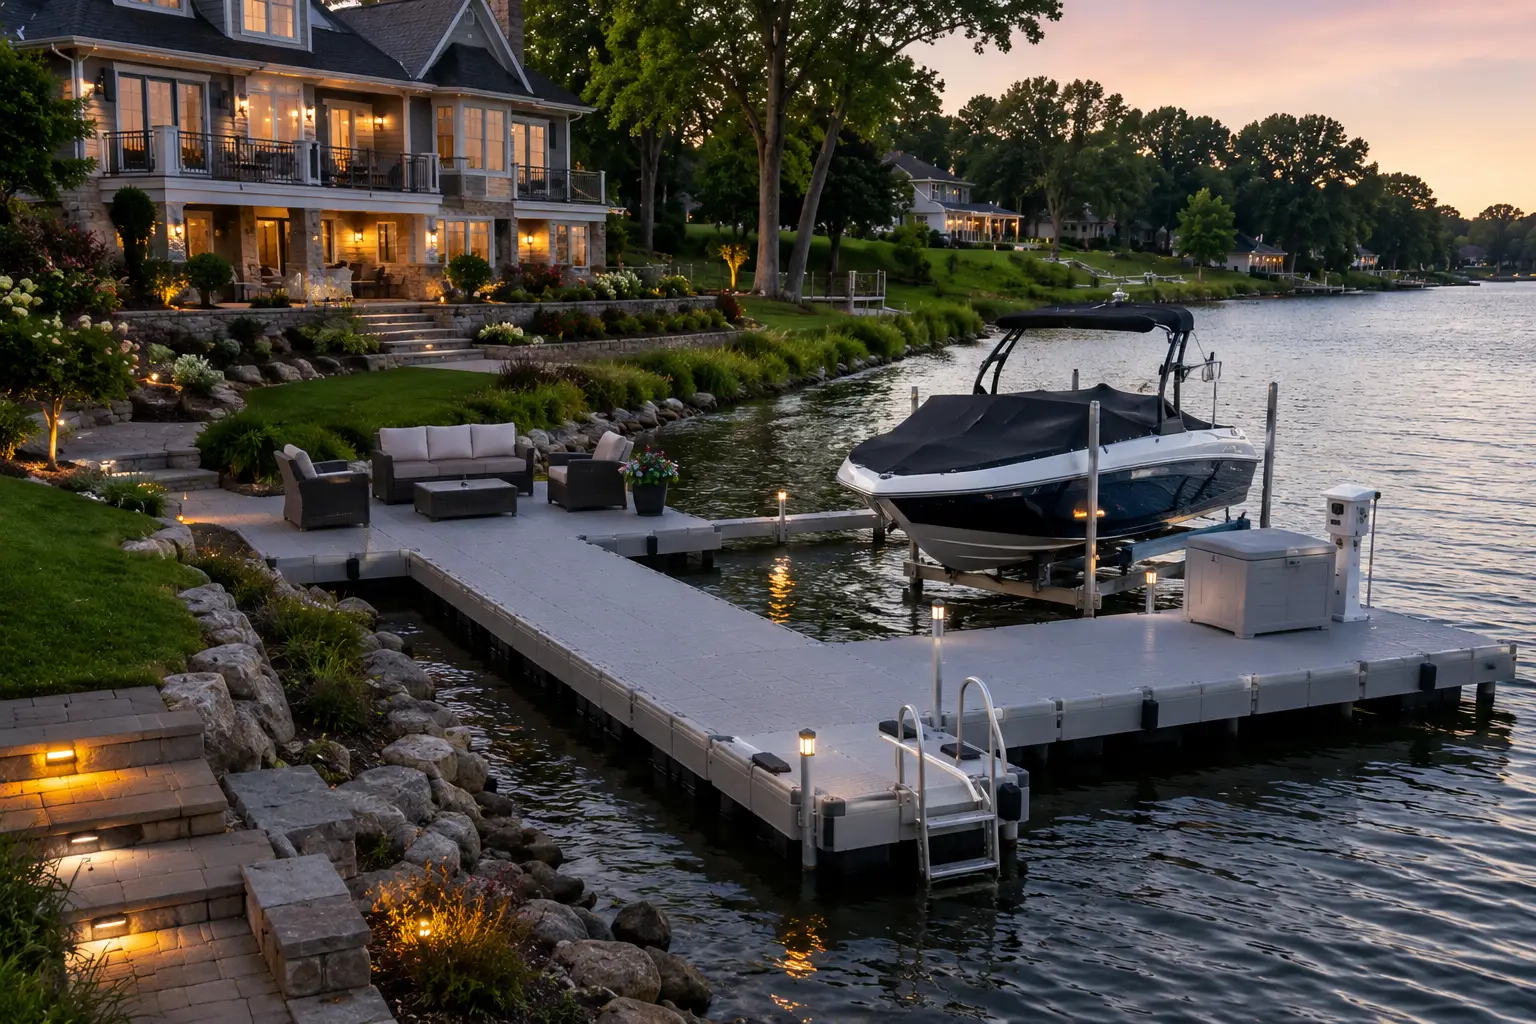
A successful floating dock installation is not merely an assembly of plastic modules; it is a calculated, deeply engineered response to the relentless kinetic energy of dynamic waterways. Whether you are architecting a high-traffic commercial harbor, planning a specialized jet ski floating dock installation for a coastal resort, or upgrading a private residential waterfront, the difference between a resilient 20-year asset and a catastrophic 3-year liability lies entirely in the precision of the installation methodology and the fundamental science of the materials used.
This comprehensive manual serves as the ultimate technical standard for modern dock installation. We are moving beyond surface-level, amateur tutorials to address the core physics of wave attenuation, the stark economic realities of installation costs, and the rigorous decision matrices required to ensure your waterfront investment remains immovably anchored.
Phase 1: Strategic Evaluation, ROI, and Material Science
The most expensive maritime structure you will ever purchase is the one you are forced to replace twice. In the B2B sector, forward-thinking decision-makers shift their focus away from initial capital expenditure (CAPEX) and strictly analyze the Total Cost of Ownership (TCO). The market is heavily saturated with low-cost, mass-produced blow-molded floats that appeal to budget-conscious buyers, but these represent a severe financial risk for professional floating dock installation services.
The Economics of Buoyancy and ROI
Let us examine the payback logic. We have analyzed historical degradation data from over 200 global waterfront projects. While an industrial-grade modular system requires a higher initial investment compared to traditional wooden fixed docks or cheap hollow plastics, the financial crossover point typically occurs within just 2 to 3 operational cycles. This rapid Return on Investment (ROI) is driven by the total elimination of annual maintenance downtime. More importantly, you avoid the catastrophic replacement costs that plague inferior systems after heavy storm seasons.
Industrial Rotational Molding vs. Stress Failure
The secret to achieving a 15 to 20-year service life lies deep within the manufacturing process. Conventional blow molding relies on injecting pressurized air to stretch molten plastic into a mold. This inherently leads to unpredictable, thin, and vulnerable wall sections—especially at the corners and connection lugs. When wave energy hits these thin spots, stress fractures inevitably occur.
Hiseadock entirely rejects this method, utilizing Industrial Rotational Molding exclusively at our advanced facility. In this highly controlled, zero-pressure thermal environment, high-molecular-weight High-Density Polyethylene (HMW HDPE) powders melt and coat the interior of the mold uniformly through precise biaxial rotation and gravity.
The engineering result is a monolithic, completely stress-free structure featuring highly reinforced, 19mm thick connection lugs. This absolute uniformity in molecular density ensures that high-stress connection points do not transform into structural fracture points, allowing our systems to withstand extreme environmental temperature fluctuations ranging from -60℃ to 80℃.

Phase 2: Deep Hydrographic Assessment and Compliance
A professional maritime structure cannot be treated as an isolated object; it is an active participant in a dynamic aquatic ecosystem. Skipping the hydrographic survey is the primary reason why many coastal projects—for instance, a highly exposed floating dock installation Wilmington or similar tidal zones—suffer from premature mooring failure or severe legal complications. Data-driven environmental planning is your only safeguard against the massive liability of a drifting structure.
Regulatory Compliance and the USACE Matrix
In many global jurisdictions, waterfront construction is governed by rigorous federal mandates. A prime example is Section 10 of the Rivers and Harbors Act, managed and enforced by the U.S. Army Corps of Engineers (USACE). Executing a commercial-grade floating boat dock installation requires absolute adherence to these permitting processes. This ensures your project does not obstruct navigable federal waterways, alter tidal flows, or inflict damage upon protected marine habitats.
Professional Survey Checklist: Before the first modular component is manufactured, your engineering team must confirm:
- Bathymetric Mapping & Tidal Ranges: Establishing the precise water depth profile at Mean Low Water (MLW) and Mean High Water (MHW).
- Substrate Core Sampling: Determining if the bed is composed of loose organic silt, hardpan clay, shifting sand, or solid bedrock.
- Velocity Profiling: Assessing peak flow velocity during spring tides or seasonal floods.

Phase 3: Technical Shoreline Assembly and Torque Tolerances
The mechanical efficiency of a modular floating dock gangway installation is realized on the shoreline, not in the water. Attempting to assemble individual modules while they are bobbing in the waves is a recipe for uneven stress distribution and compromised hardware.
The Engineering Assembly Protocol:
- Precision Pin Driving: The heavy-duty center connection pins must be seated using a non-marring dead-blow hammer. This ensures pins are fully engaged within the 19mm lugs without introducing micro-fractures into the HDPE structural skin.
- Geometric Verification: Verify the cross-diagonals of the assembled platform section. Diagonals differing by more than 1/2 inch indicate the dock is “out of square,” leading to stress concentration in wave action.
- Torque Specifications: Tighten every perimeter bolt to exactly 18 to 22 ft-lbs using a calibrated torque wrench. Too loose, and vibration will back them off; too tight, and you crush the HDPE elastic limit.

Safe Launching: Use high-density solid timber glides or polyethylene rollers. Chemical “marine-grade lubricants” violate clean water protection acts and should be strictly avoided during the launch phase.
Phase 4: The Anchoring Reality Check and 5:1 Mooring Physics
At Hiseadock, our commitment is rooted in operational transparency. While surface assembly can be executed by a 2-man crew, the sub-surface mooring phase is not a DIY task. Driving steel pilings or deploying 1,500lb concrete deadweights requires professional marine contractors utilizing crane barges.
The Physics of the 5:1 Chain Scope Rule
The ultimate fail-safe is the anchoring scope. In dynamic waterways, a 3:1 ratio creates vertical pulling forces that uproot anchors. Hiseadock mandates a 5:1 Chain Scope Ratio to force the formation of a Catenary Curve—an underwater shock absorber that converts wave kinetic energy into gentle horizontal tension.
Interactive Tool: Anchoring Dynamics Simulator
Professional Engineering Matrix
| Environment | System | Critical Engineering Solution |
|---|---|---|
| Deep Water / Hard Rock Substrate | Deadweights & Chains | Material Consistency & Electrical Insulation: Ensure all hardware is of the same metal grade (all 316 SS or all HDG) or use non-conductive isolation sleeves to block galvanic coupling bridges. |
| Tidal Fluctuations / Soft Muck | Steel Pilings | Pilings must penetrate the muck layer into hardpan. Brackets must use self-lubricating UHMW-PE rollers to prevent binding during tidal shifts. |
| River Flow / Narrow Banks | Stiff-Arms | Zero lateral deflection design. Use tri-axial hinge plates attached to deeply set concrete shoreline abutments. |
We understand that transitioning from a theoretical dry blueprint to a stable waterfront platform involves daunting engineering variables. You do not have to navigate these hydrographic calculations and logistics matrices alone.